
Visit to Mark Hewitt's Pottery, North Carolina
The night after we stopped at Cave Creek Pottery (covered in my last
post), we trundled along the back roads of North Carolina to Mark
Hewitt's pottery in Pittsboro. Patti gave us a loaf of her excellent
homemade bread to take along. We all met together in Italy; Doug was
part of the group taking Mark's class at La Meridiana.
Watching Mark throwing a 5 foot tall flower pot and hat stand in Italy was the first time I have ever seen pots thrown on this scale. I had seen videos of different techniques, such as Lady Kwali at the Abuja Pottery, but never in person. Lady Kwali comes to mind because she trained with Michael Cardew just as Mark Hewitt did. In person it was amazing, he built the pot up with such ease. Spending time with him and seeing his skills made me realise I had to visit Mark's pottery at some point. Mark comes from Stoke-on-Trent; his family were behind the bone China manufacturers, Spode. But instead of following his family into industrial ceramic production he forked out on his own, into the studio pottery tradition. After apprenticing for three years with Michael Cardew he also apprenticed with Todd Piker in Connecticut before settling in Pittsborough (in 1983) to build up his own studio.
When we arrived, Mark was out at a meeting at the North Carolina Pottery Center. Carol, his wife (who I also met in Italy and who is very involved with managing the pottery) brought us inside and dished up a cheese platter with thick slices of Patti's bread and a selection of preserves to keep the wolf from the door. Jon, Mark's newest apprentice, took us on a brief tour of the place before we headed out for some local beef burgers at a pub nearby. Carol is big on locally produced food and locally sourced funds, and recently wrote this great book.
The
next morning we got to have a proper look around. The kiln had just
been fired and sat clammed up, still warm after the 90th firing. Mark
stamps the bottom of each pot with the number of the firing; when you walk around and pick up a mug from
firing 3, he can tell you when it was and about the intricacies of the
firing. It also encourages collectors to get a piece from every firing.
The workshop has a dirt floor, which is now all knobbly and cobbled
through years of heavy use. It feels terribly authentic. The space was clean, ready for the kiln
opening in a few days, so there were no pots out drying but the air was thick with the weight of their missing forms. The grounds
around the pottery are beautiful, with a pond and a new apple orchard recently planted by Carol. A shed has been converted into a gallery for
most of the pots, whilst the really large ones sit outside on pedestals.
Lauren and I helped re-price some of the pots in the gallery as a group of ladies were stopping by that afternoon, and then I got involved with Adrian and Jon mixing clay. It was hot dusty work which abruptly ended when the belt came apart at the stapled seam. Mark and I headed to a nearby town to get a new attachment, chatting about all sorts on the way, from his apprenticeship with Cardew to the potential for me becoming his next apprentice. It would be a great experience, I think. Adrian, who has been apprenticing there a while, is making sweet pots. Plus the area around the pottery is stunning. But enough words, now for some pictures.


It is a great place full of magnificent pots (I didn't take any pics of the ones inside but there were countless beauties) and I can't wait to return sometime soon, perhaps for a kiln firing.
My next post will be about some of the pots I have been making here in New York!
Watching Mark throwing a 5 foot tall flower pot and hat stand in Italy was the first time I have ever seen pots thrown on this scale. I had seen videos of different techniques, such as Lady Kwali at the Abuja Pottery, but never in person. Lady Kwali comes to mind because she trained with Michael Cardew just as Mark Hewitt did. In person it was amazing, he built the pot up with such ease. Spending time with him and seeing his skills made me realise I had to visit Mark's pottery at some point. Mark comes from Stoke-on-Trent; his family were behind the bone China manufacturers, Spode. But instead of following his family into industrial ceramic production he forked out on his own, into the studio pottery tradition. After apprenticing for three years with Michael Cardew he also apprenticed with Todd Piker in Connecticut before settling in Pittsborough (in 1983) to build up his own studio.
When we arrived, Mark was out at a meeting at the North Carolina Pottery Center. Carol, his wife (who I also met in Italy and who is very involved with managing the pottery) brought us inside and dished up a cheese platter with thick slices of Patti's bread and a selection of preserves to keep the wolf from the door. Jon, Mark's newest apprentice, took us on a brief tour of the place before we headed out for some local beef burgers at a pub nearby. Carol is big on locally produced food and locally sourced funds, and recently wrote this great book.
 |
| We must be at the right place. |
Lauren and I helped re-price some of the pots in the gallery as a group of ladies were stopping by that afternoon, and then I got involved with Adrian and Jon mixing clay. It was hot dusty work which abruptly ended when the belt came apart at the stapled seam. Mark and I headed to a nearby town to get a new attachment, chatting about all sorts on the way, from his apprenticeship with Cardew to the potential for me becoming his next apprentice. It would be a great experience, I think. Adrian, who has been apprenticing there a while, is making sweet pots. Plus the area around the pottery is stunning. But enough words, now for some pictures.
 |
| The front of their house |
 | ||||
| I love the surface of this pot. |
 |
 |
| Ooooh look at those drips. |
 | ||||||||
 |
| You could fit a whole lot of honey in that pot |
 |
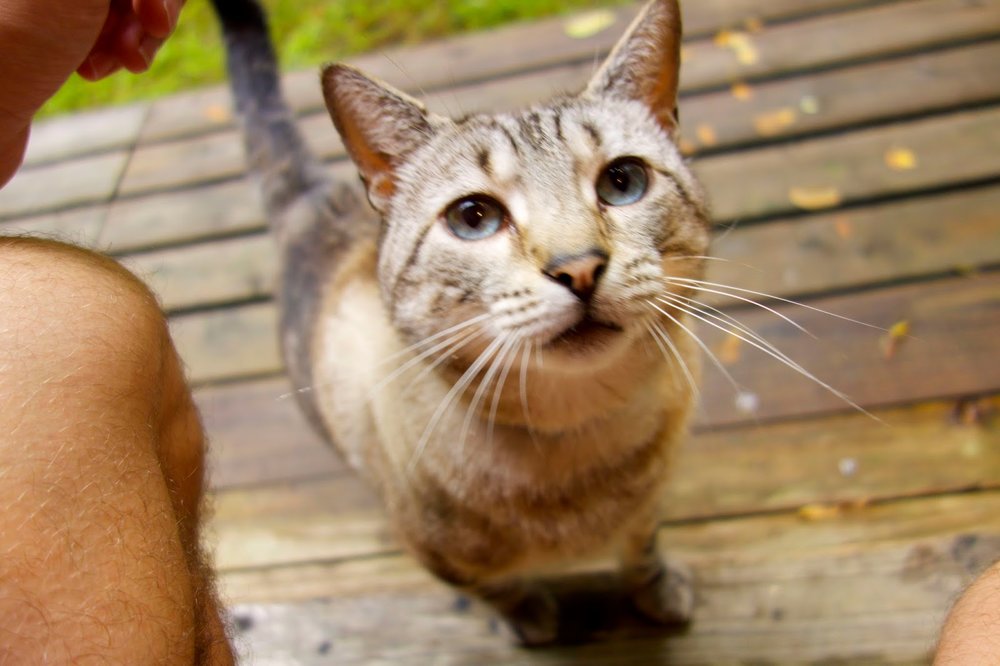
| One of the Hewitt cats |
 |
 |
| Close up. |
 |
| Looking in on the kiln shed |
 |
| The kiln-it is fairly massive |
 |
| Side door of the kiln, clammed up. |
 |
| Shed/gallery on the left, pedestals awaiting new pots in the middle. |
 |
| Crazy shapes |
 |
| Apprentices pots lined up |
 |
| Inside the shed/gallery |
 |
| Mark with his current apprentices Adrian (left) and Jon (right), fixing the belt. |
My next post will be about some of the pots I have been making here in New York!
Visit to Cave Creek Pottery, North Carolina
On our roadtrip across the country from L.A to New York, we went through North Carolina in order to visit some potters. North Carolina has more potteries than any state by far; it's a hotbed of ceramic activity. I met Doug and Patti Hubbs whilst at La Meridiana Ceramics School, in Tuscany. I was an assistant and Doug a student with Patti coming along for the trip. They were both lovely, and I saw that Doug was an excellent potter. We kept in touch and they supported our India project, so when we knew we'd be in the vicinity a visit was definitely in order.
Their house is on "Over Creek Road" and you quite literally have to cross a creek to get to the house. As Lauren's red Toyota (Lucille) whooshed through the water and we made it across it felt like we were in a magical place. The grounds are encircled by forest and their house is built into the side of the hill. Everett the cat greeted us first; he is a magnificent cat, a mountain cat. About twice the size of normal house cats, we thought he must be a Maine Coon. Apparently he catches rabbits amongst other things. Doug, Patti and Everett took us on a walking tour of the property to see the veg patch, pond, pottery gallery etc. As night was falling we saw a deer run across the glade.
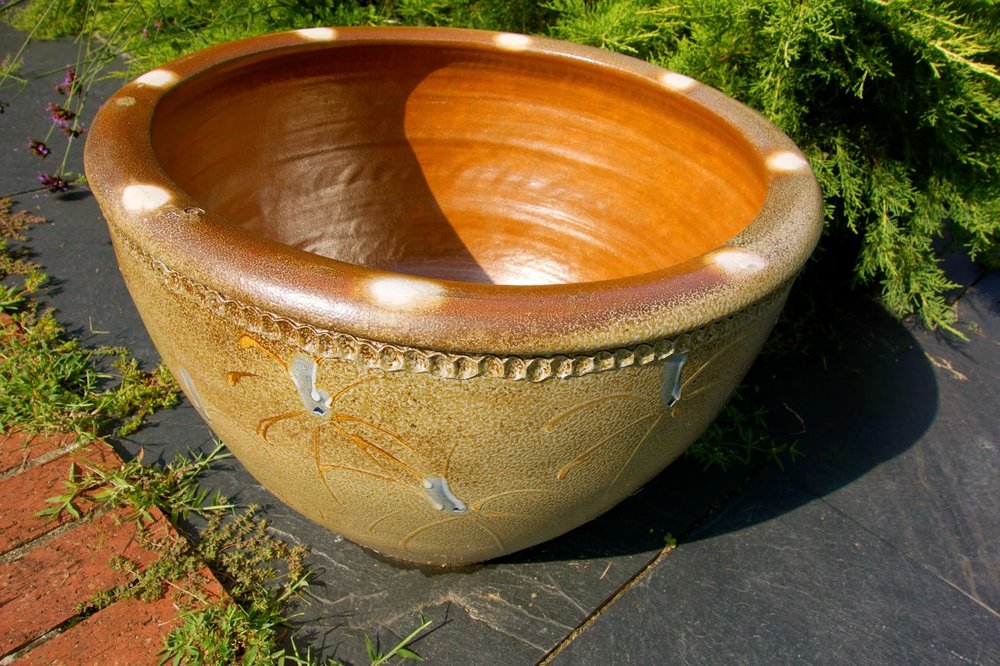
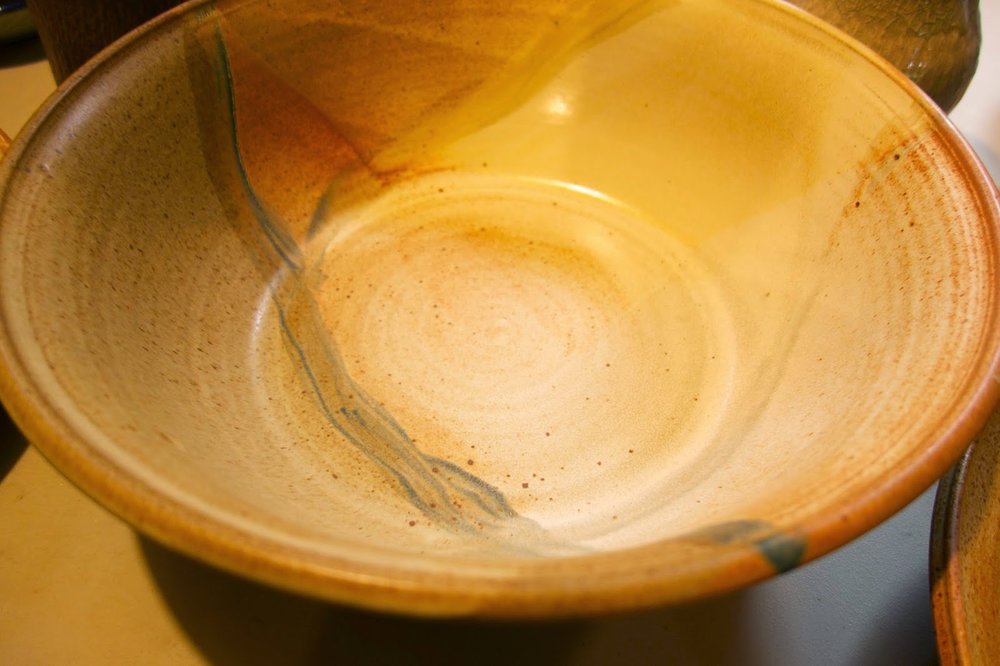
Patti and Doug asked us to choose a pot as a present for getting married a few weeks previous to our visit. It was a tough choice, but we went for a large shallow bowl similar to the ones below. We almost hung it on the wall but it's too useful, holding all of our onions, garlic, potatoes etc in the kitchen.

The gallery was stocked floor to ceiling with pots from multiple different firings. The ones at the bottom of the picture below were super shiny metallic from a heavy reduction raku.

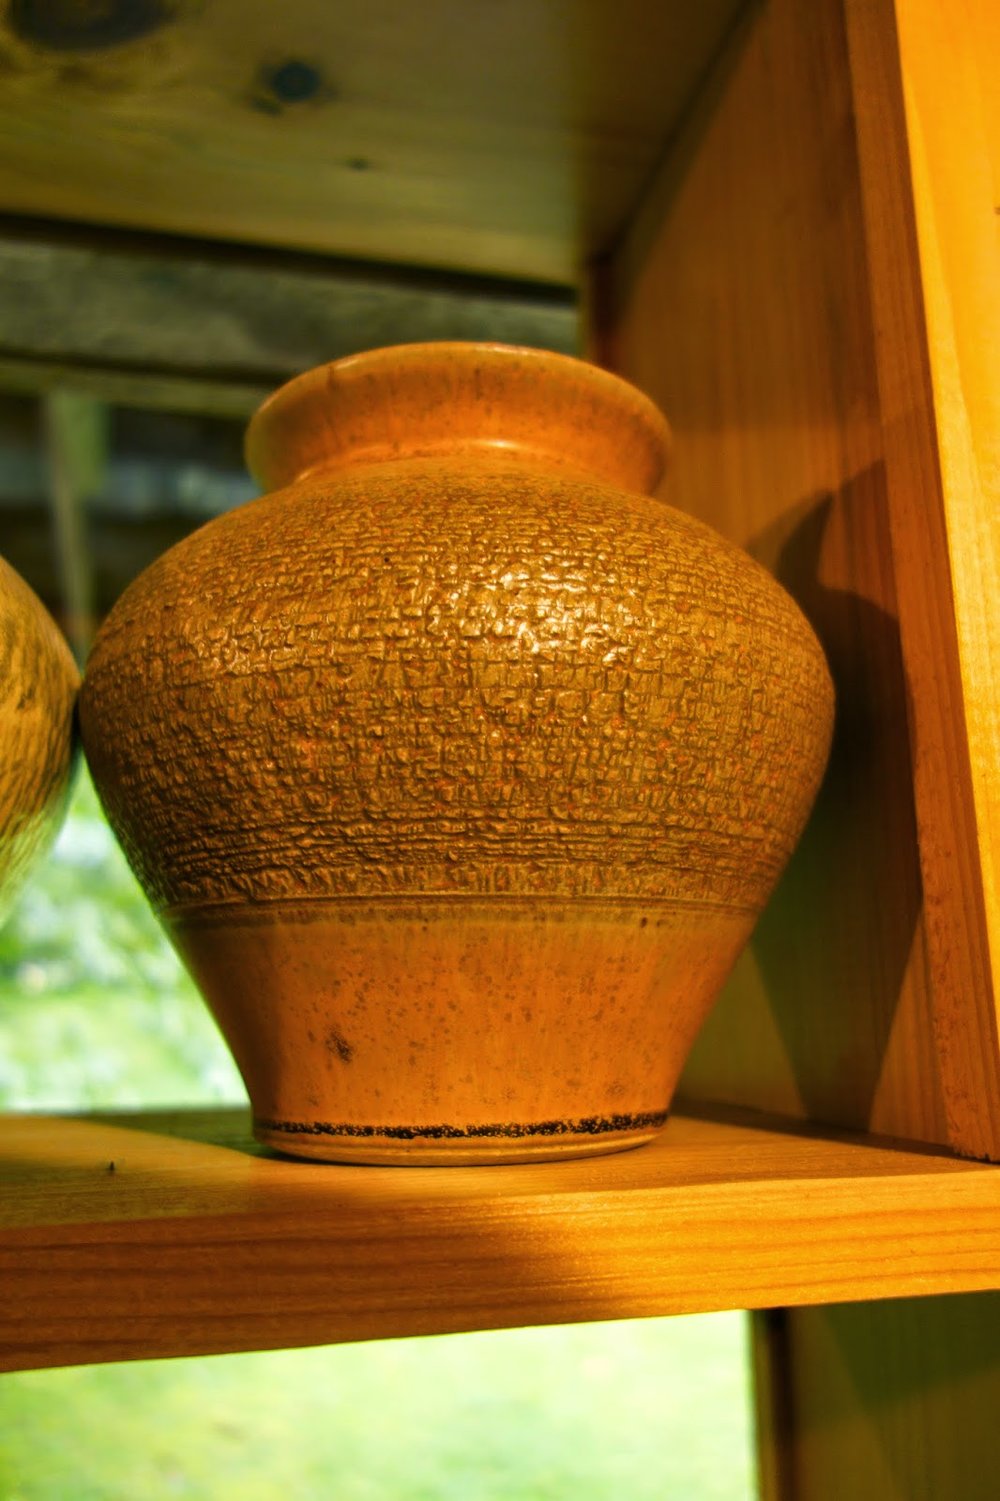
Doug's signature technique is to chatter his pots at the leather hard stage to give a textured finish to them. Here's a clear example:
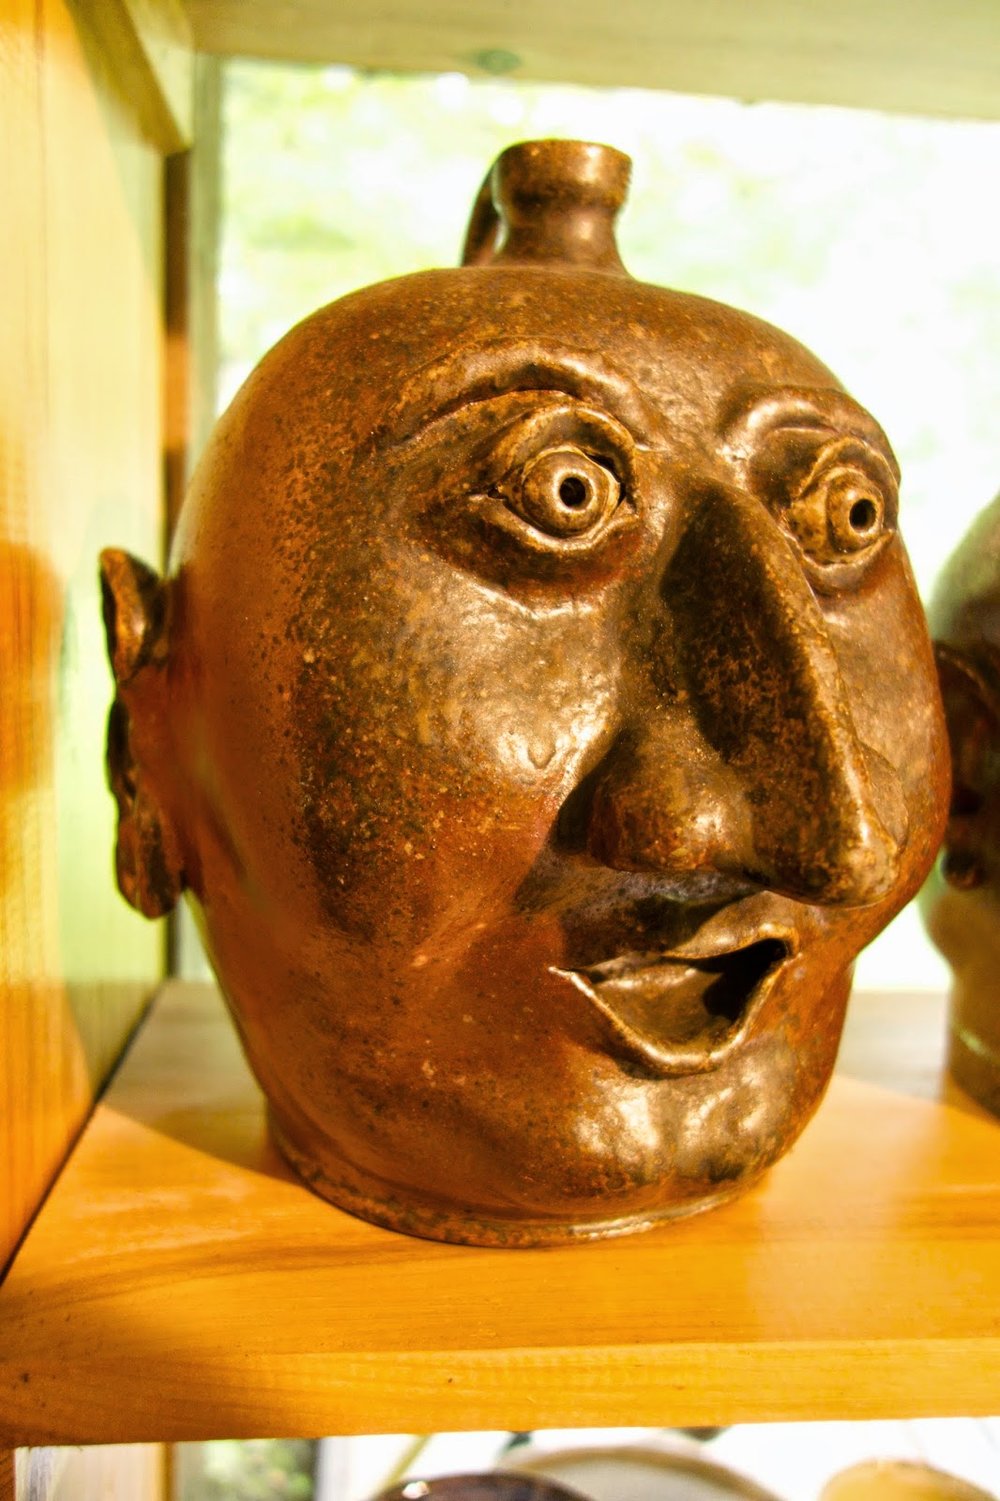
Doug doesn't just make functional ware, though; he also experiments with sculpture, such as these lively face jugs:


And finally, two little critters who were hiding in the corner of the room. I nearly missed them...


It was a truly lovely visit and we can't wait to go back at some point.Here's a link to the Cave Creek website: http://cavecreekpottery.com/
Their house is on "Over Creek Road" and you quite literally have to cross a creek to get to the house. As Lauren's red Toyota (Lucille) whooshed through the water and we made it across it felt like we were in a magical place. The grounds are encircled by forest and their house is built into the side of the hill. Everett the cat greeted us first; he is a magnificent cat, a mountain cat. About twice the size of normal house cats, we thought he must be a Maine Coon. Apparently he catches rabbits amongst other things. Doug, Patti and Everett took us on a walking tour of the property to see the veg patch, pond, pottery gallery etc. As night was falling we saw a deer run across the glade.
 |
| Doug and Patti's house. |
 |
| Everett the big friendly cat |
 |
| Fireplace |
 |
| Doug's Pottery Gallery |
 |
| Lauren holding the pot they gave us as a wedding present. |
 |
| Back window of the gallery |
 |
| Side window |
 |
| Window sill pots |
 |
| Pot graveyard |
 |
| A plate I found in the graveyard |
 |
| Guardian Elephant |
 |
| Pig pot |
 |
| Lauren with Everett. Look how big he is! |
The gallery was stocked floor to ceiling with pots from multiple different firings. The ones at the bottom of the picture below were super shiny metallic from a heavy reduction raku.
 |
| Many unusual pots! |
 |
| Top shelf. |
 |
| Horse hair firing |
 |
| Great red colouring on this low fired pot. |
 |
| Drinking vessels |
 |
| I particularly like these ones, they seem so alive. |
 |
| Tea set. |
 |
| Various ladles |
 |
| A beautiful plate made with glass; unfortunately, it cracked in the firing |
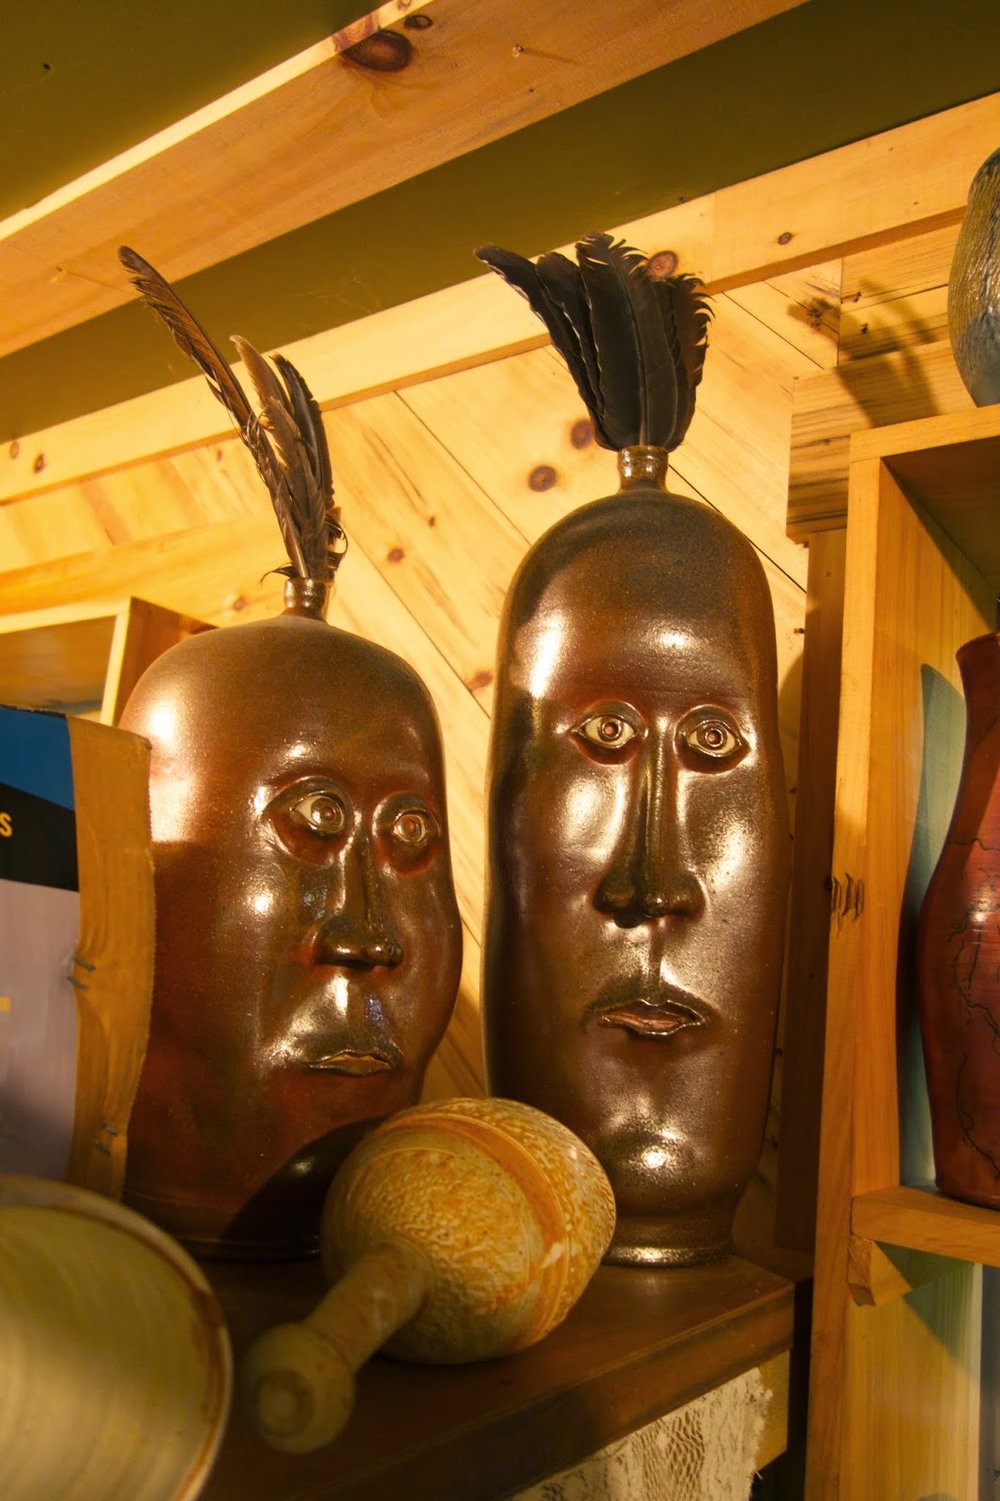 |
| Big wise face jugs |
It was a truly lovely visit and we can't wait to go back at some point.Here's a link to the Cave Creek website: http://cavecreekpottery.com/
How To Start A Worm Farm
New York now has food recycling bins which is a great step forward for the city, the only thing is, (and you can call me selfish for this), but I don't want to give my vegetable scraps away to the city. I want to make them into lovely compost to feed my new rooftop garden in the spring.
So a few weeks ago I started a compost bin up on the roof. I'd take our scraps up there and turn the mix with a length of wood every day. However, reading online articles online about how to effectively compost your waste, I was struck by the amount of people who say that worms are the quickest and best way to get the most beautiful unctuous 'black gold' compost.
Here is my video where I show you how to put together your very own worm farm. Believe it or not there are actually a number of worm farm videos on youtube already, but here is my effort anyway. I hope you enjoy it! More info etc on the process below.
This is not a new idea. It has been around a while and even has a fancy name: in high-vaulted worm circles it is called vermiculture or vermicompost. After researching the subject in depth, I'm sold. Cornell University has a big ongoing worm research project. They have found that worm castings (what is left once they have munched your waste) is an excellent alternative to pesticides: it not only nourishes your soil but actually helps plants fight off pests and diseases.
The worms provide compost that is "7 times richer in phosphates, 5 times richer in nitrogen, and 11 times richer in potash than the average lawn soil" [according to Uncle Jim], as well as helping suppress plant diseases. We aren't talking about your standard earth worms, these are "red wrigglers" specifically bred for the purpose. Red wigglers, or Eisenia foetida, don't burrow like your standard earth worms. They are a very sociable breed of worm, living well in close, highly-populated conditions.
Anyway, that's enough about the worms. Let's get on with it.

The diagram above is basically what I followed, adapting it slightly to use five gallon buckets.You can use bought bins from a hardware store but you can also find five gallon buckets many places (restaurants etc). The only things I had to buy were the tap and the worms.
What you need:
I used a fairly small drill bit for the holes in the sides to stop flies getting in and a slightly larger one for the holes between the buckets so the worms can wriggle through and play on any level.
In terms of maintaining the worm farm all you have to do is regularly feed the worms... fruit and vegetable scraps are best, ideally cut into small pieces as they only have tiny mouths. I have been avoiding citrus peel and onion/garlic skins and pits of fruits. Also remember to keep them moist!
So a few weeks ago I started a compost bin up on the roof. I'd take our scraps up there and turn the mix with a length of wood every day. However, reading online articles online about how to effectively compost your waste, I was struck by the amount of people who say that worms are the quickest and best way to get the most beautiful unctuous 'black gold' compost.
Here is my video where I show you how to put together your very own worm farm. Believe it or not there are actually a number of worm farm videos on youtube already, but here is my effort anyway. I hope you enjoy it! More info etc on the process below.
This is not a new idea. It has been around a while and even has a fancy name: in high-vaulted worm circles it is called vermiculture or vermicompost. After researching the subject in depth, I'm sold. Cornell University has a big ongoing worm research project. They have found that worm castings (what is left once they have munched your waste) is an excellent alternative to pesticides: it not only nourishes your soil but actually helps plants fight off pests and diseases.
The worms provide compost that is "7 times richer in phosphates, 5 times richer in nitrogen, and 11 times richer in potash than the average lawn soil" [according to Uncle Jim], as well as helping suppress plant diseases. We aren't talking about your standard earth worms, these are "red wrigglers" specifically bred for the purpose. Red wigglers, or Eisenia foetida, don't burrow like your standard earth worms. They are a very sociable breed of worm, living well in close, highly-populated conditions.
FUN FACT ~ Red Wriggler worms can double their population every 90 days.
Anyway, that's enough about the worms. Let's get on with it.
The diagram above is basically what I followed, adapting it slightly to use five gallon buckets.You can use bought bins from a hardware store but you can also find five gallon buckets many places (restaurants etc). The only things I had to buy were the tap and the worms.
What you need:
- x3 Five Gallon Buckets (available for free at many places, such as sushi restaurants)
- x1 Five Gallon Bucket Lid
- x1 Drill
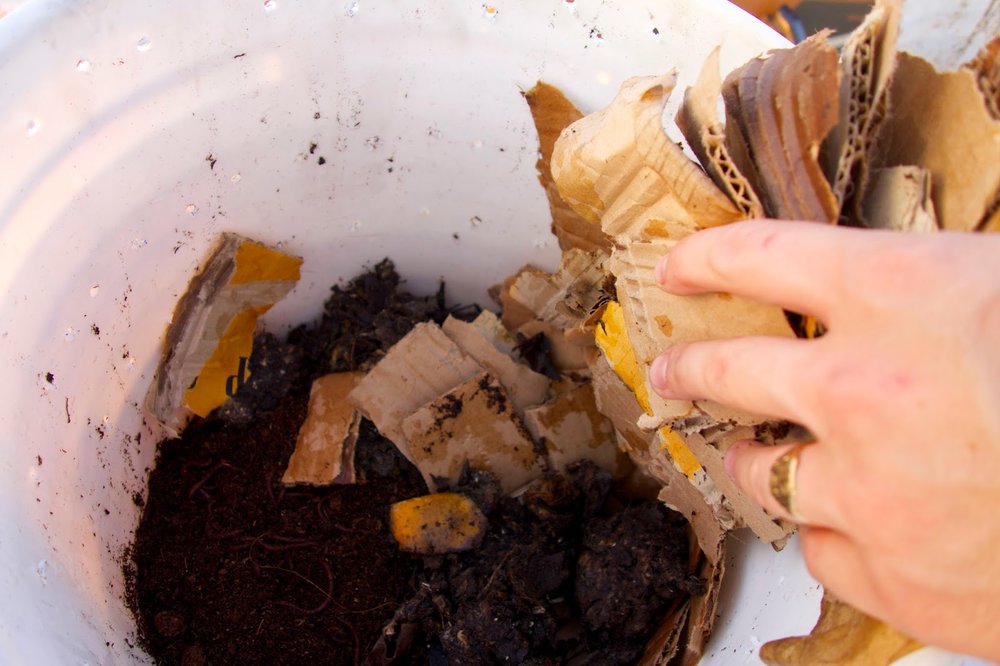
- x3 cardboard boxes (ripped up to make worm bedding)
- x1 plastic tap
- x500 or 1,000 Red Wriggler Worms (I got mine from Uncle Jim-he has a much bigger operation!)
 |
| My worm supplier. |
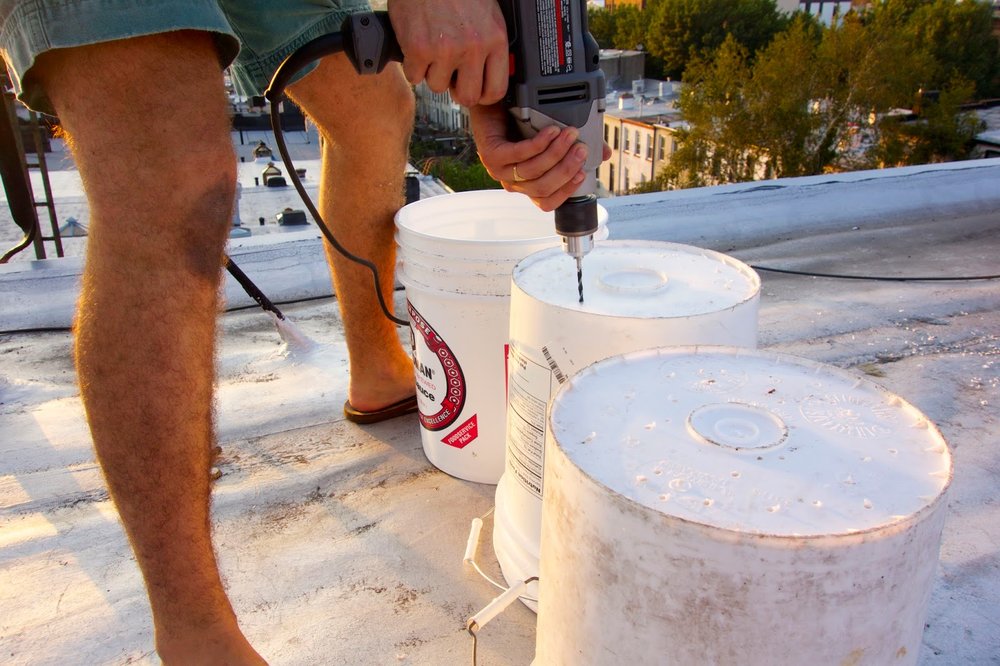 |
| Drilling time. |
 |
| Homemade cardboard worm mattress. |
 |
| I added some soil to make the worms extra comfy. |
 |
| In go the worms and some food! |
 |
| I hope the worms were as happy as me. |
 |
| They don't like light so its good to give them a good covering of cardboard. |
 |
| Making the bed. |
 |
| This is luxury for a worm! |
 |
| The final product. Pretty much free and guaranteed to make beautiful compost for the garden. |
 |
| A deserved Baba beer. |
In terms of maintaining the worm farm all you have to do is regularly feed the worms... fruit and vegetable scraps are best, ideally cut into small pieces as they only have tiny mouths. I have been avoiding citrus peel and onion/garlic skins and pits of fruits. Also remember to keep them moist!
Building A Recycled Rooftop Garden
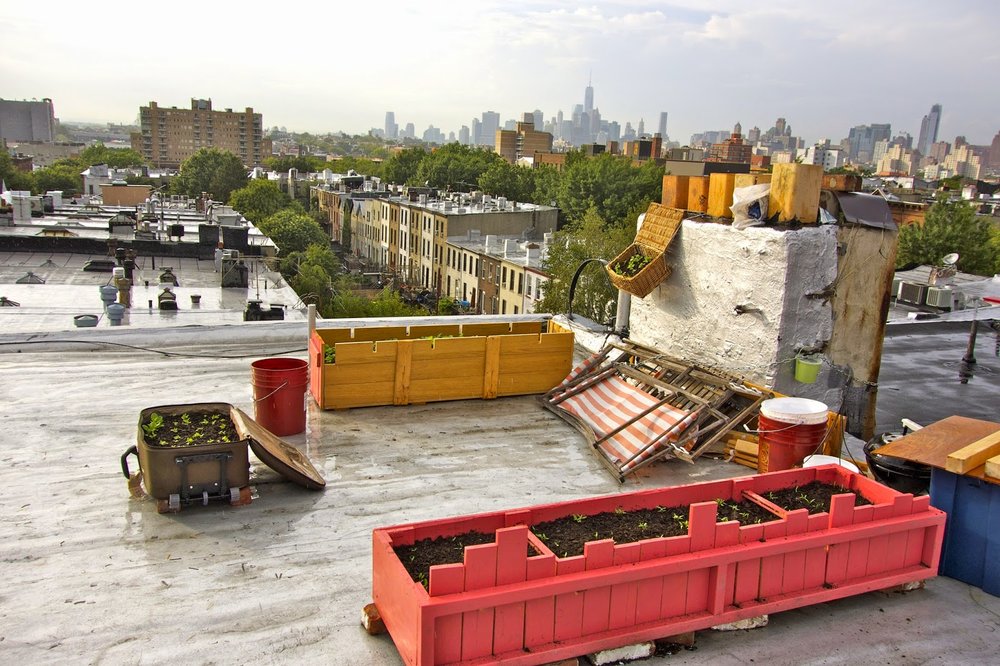
Lauren and I moved into an apartment in Brooklyn (Park Slope) with two friends, Katie and Evan, three weeks ago. After several trips to IKEA and much elbow grease, our room is set up. One of the best features about the place is that we are on the fourth floor and have access to a roof directly above us. You have to climb out of our bedroom window and up a fire escape to get there, and we aren't totally sure if we're supposed to be doing it, but the view is too good to not.
Instead of finding a job right away, which I should really have been doing, I decided to turn the empty space on the roof into a garden. The first planter came in the form of a suitcase which fell apart on the way from the car up the stairs. We bought the suitcase in Delhi to cart copies of 100 Days of India back to the states and it survived all the way to the third floor of our apartment before failing us. It seemed sad to just throw it away, so I flung it up onto the roof and proceeded to cut some holes in the bottom with my Leatherman.

I went round the corner and bought a bag of organic potting soil and a packet of bok choi seeds. Lugging it up the stairs and then up the fire escape wasn't fun, and to my horror it didn't even fill the suitcase halfway. Back down and around the corner again, this time to get two more bags. This did it and I got the seeds straight in the ground. It was pleasing, but by no means did this constitute a garden.

Over the next few days I collated materials from the streets around our place. People in Park Slope seem to throw all sorts of things out on the pavement in front of their apartments. This happened in Portland, Oregon, too, but due to the rain, everything always looked soggy and unsavory. You rarely found a gem worthy of bringing home. Here, I found an old oak bed which was dismantled, some slats from a different bed, several 5-gallon buckets, a large drawer which was mostly in one piece and a whole load of random lengths of pine. I didn't even have to search hard, it was epic.
Lauren was worried about bed bugs, which are still a big problem in New York, but I contended that they can't burrow through ceilings. I tried to get the wood through the door and onto the roof as fast as possible. Some of the pieces were light and easy to get up the fire escape but others were challenging. An oak headboard was the hardest item to deal with. Lauren stood at the top of the ladder whilst I hoisted it up. It wasn't quite long enough/I wasn't quite tall enough, so she ended up having to heave more of it than we expected. Dangerous times. I do not recommend this! I vowed to choose manageable pieces of wood in the future.
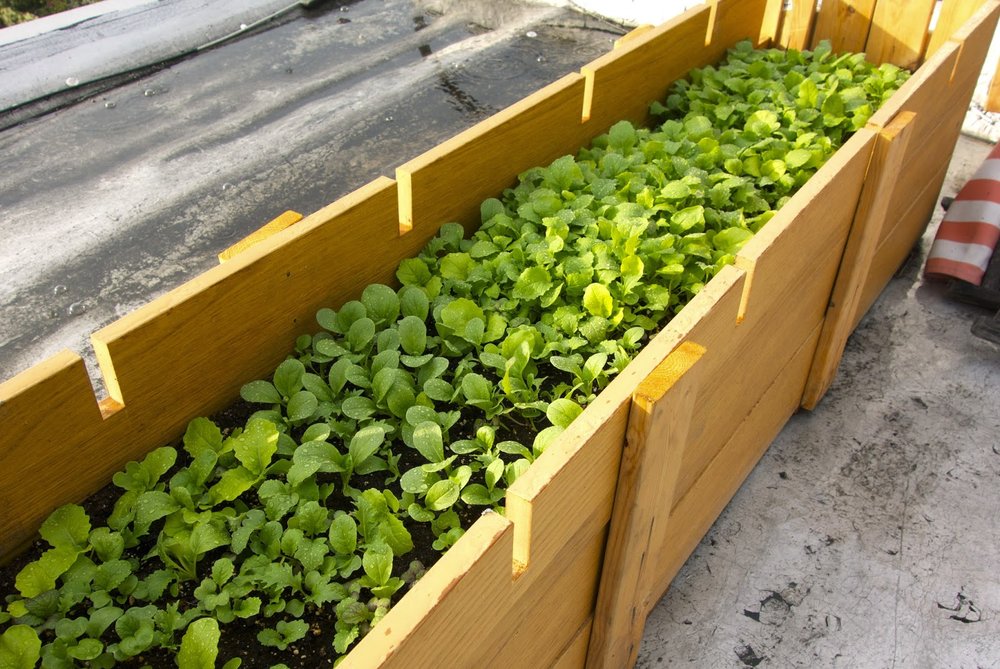
Anyway, an afternoon sawing up lengths and a packet of nails later, and I had two more planters. Holes drilled in the bottom of each for drainage. We'd made a set of tea shelves for the kitchen, too, and had some pink paint left over (a mix of an old 1/3 can or red and 1/2 a can of white) so one of the planters got pinked. It took two trips to Home Depot to pick up enough soil to fill them. In the pink planter (below), we planted spinach, rainbow chard and golden beets, and in the unpainted one below it, mustard greens and a mix of other lettuce leaves. Oh and a bit of sage at the end. One final touch was a basket found nearby too which we strung up and planted with a mix of everything.


The rooftop garden in all its glory so far. Deckchairs at the ready!
In my next post I will be discussing and detailing the next step in the formation of the rooftop garden: building a WORM FARM! I can tell you are excited.
Vistit to Golden Bridge Pottery, Pondicherry
Adil Writer, who my last post focused on, recommended I visit the Golden Bridge Pottery, just down the road in Pondicherry. Most of the potters in Auroville trained with Ray Meeker and Deborah Smith there. Its only half an houror so away.
An abridged history of them and the pottery: before coming to India, Deborah apprenticed for a year with Yamomoto Toshu in Bizen, and Ray studied architecture and ceramics. The Sri Aurobindo Ashram drew them to this corner of southeastern India. They opened in 1971, and became the first producers of hand thrown glazed stoneware in South India.
Over the years a plethora of excellent potters have come and teach at Golden Bridge, including; Jim Danisch, Mike Dodd and Betty Woodman. Everyone we met in Aurovile talked about Golden Bridge Pottery as an inspiring place, but when we got off the bus in Pondi, (supposedly nearby) no rickshaw driver knew where it was. We had to borrow a policeman's phone to call and get directions... the rickshaw driver wasn't happy because the policeman negotiated for us and we got a far cheaper ride than he would have given us alone.
We arrived to find Ray, a very tall, friendly American, standing over a ginormous ceramic bust while one of his assistants meticulously scraped glaze off her muscular shoulders. The glaze had been applied incorrectly, so it had to be removed and re-applied. It was dusty work! He showed us around a bit, pointing out his collection of fabulous kilns: one massive 1400 cubic metre wood-fired kiln in which he fires large sculptural pieces, plus several smaller kilns and one very sweet anagama, made with a bamboo former.

Close up on the kiln bricks:


Here is Deborah's kiln plan:
 \
\The Anagama:

They have a small shop on the premises which has some lovely pots in it:


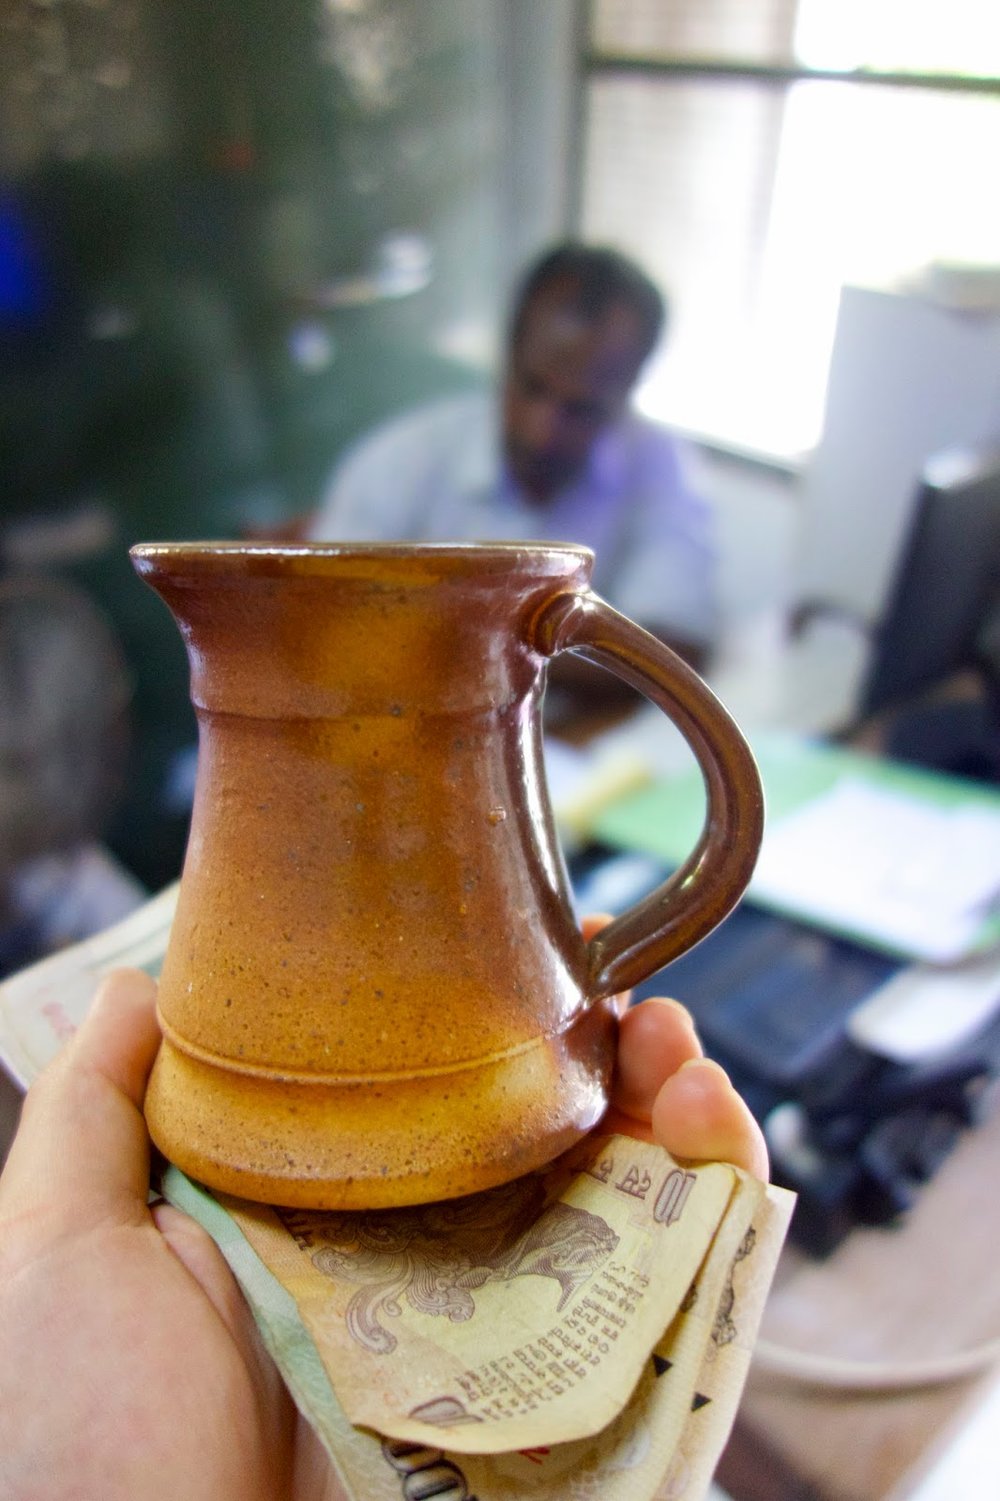
We bought a beautiful, tiny teapot and got to meet the potter who made it (pictured below). He explained to me how he made such tiny lids and spouts. Sri Aurobindo and the Mother are on the wall in the background.

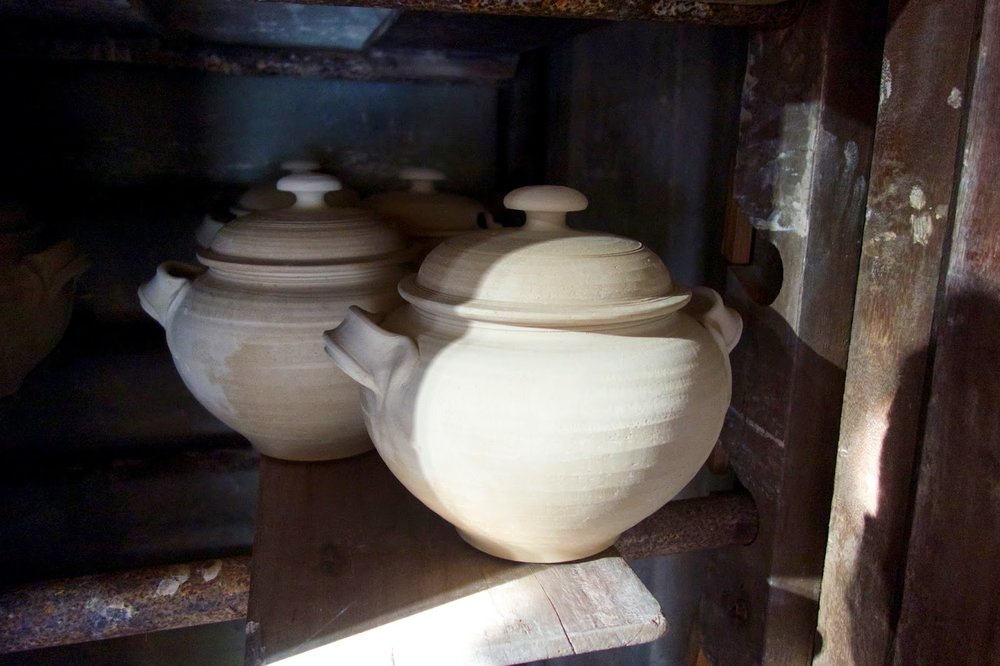
Casserole dishes:
Stacks for the wood firing:

Bags of clay:

These are the drying pans, used after the clay is mixed to dry out:

Every summer, Ray and Deborah have a pottery course, and we got to see it in action. The course is 7 months long, and as we were leaving Ray asked if I'd like to come and teach it the following year. Tempting offer, but that's a while to be hanging out in Pondicherry!

Fresh off the wheel:

Traditional earthenware horses hang out in the grounds:

So this is my last post from India. I've been back awhile but just got round to finishing this. Lauren and I finished driving cross country, from L.A. to New York, and just moved into an apartment with a couple of friends. Here's a picture of what we spent all day putting together yesterday:
 |
| 'Brimnes' by IKEA |
Adil Writer & His Mad Ceramic Wall Hangings. Mandala Pottery, Auroville.
Whilst visiting the Dana Community, I saw Adil Writer and Anamika making pieces for the wall. I had been thinking about this possibility, as it seems that people are more willing to buy art that hangs on the wall rather than sits on a shelf (or at least they're willing to pay more for it).
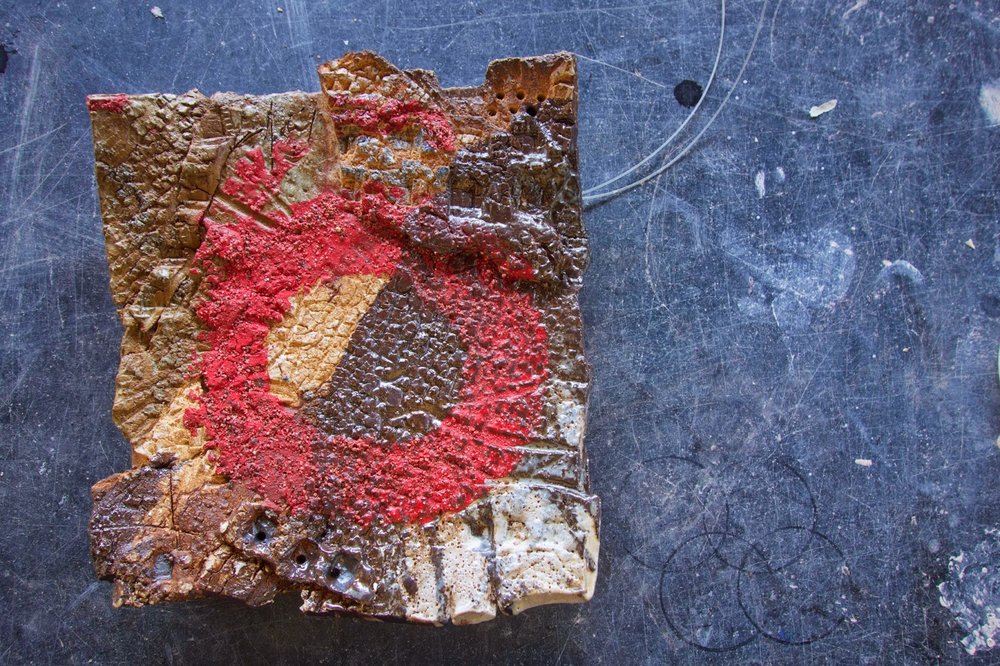
Until I saw the finished result I was dubious as to whether these pieces would work. It seemed like Adil and Anamika were just throwing old bits of dry clay on thick square slabs. Adil told me he never recycles clay to be thrown with again, instead letting it dry out and then using it for pieces like this. As the layers built up, forms took shape. The work was very fast and spontaneous, no time for thinking or conceptualizing.
I thought this was the end of them. Ready for firing. So went around and saw what everyone else was up to, taking some pics and videos of the other potters at work. After some time (in India people always tell you things will happen in "some time"), someone came to tell me Adil wanted to show me something.
When I got back he was already in full flow, slapping the square slabs on the concrete floor. Not once or twice but many times; he didn't even stop when the slabs ripped and tore in pieces. I thought this was utter madness, but he seemed to have done it before.
After this I was led to another workspace where larger squares of clay had been laid out, all cross-hashed and slipped, ready to accept a shaggy crust.
The solid backing gives the torn surface pieces support and allows them to be hung safely. During the firing the top layer curls up like a lily pad. Here is a finished one:
After the performance Adil invited me upstairs to the studio where a lot of his finished works were hanging around, waiting to be shipped off for exhibitions.

Hands littered the floor.
Before I left I popped my head in another little space and found a selection of large platters.
And some finished ones:
So that's a taster or the ceramics being made at Mandala Pottery. Next post will be about the pottery where most of the potters in the Dana Community trained: Golden Bridge Pottery in Pondicherry.
Until I saw the finished result I was dubious as to whether these pieces would work. It seemed like Adil and Anamika were just throwing old bits of dry clay on thick square slabs. Adil told me he never recycles clay to be thrown with again, instead letting it dry out and then using it for pieces like this. As the layers built up, forms took shape. The work was very fast and spontaneous, no time for thinking or conceptualizing.
 |
| Each slab got numerous different clays on it. |
 |
| Crumbly surface. |
 |
| The final splosh on each was red iron oxide, liberally applied. |
 |
| Bloody corner. |
I thought this was the end of them. Ready for firing. So went around and saw what everyone else was up to, taking some pics and videos of the other potters at work. After some time (in India people always tell you things will happen in "some time"), someone came to tell me Adil wanted to show me something.
When I got back he was already in full flow, slapping the square slabs on the concrete floor. Not once or twice but many times; he didn't even stop when the slabs ripped and tore in pieces. I thought this was utter madness, but he seemed to have done it before.
 |
| There it goes. |
 |
| And again. |
 |
| Never mind those tears. |
After this I was led to another workspace where larger squares of clay had been laid out, all cross-hashed and slipped, ready to accept a shaggy crust.
 |
| The surface of the clay slapped n the floor was stretched and cracked-a nice effect even unfired. |
 |
| Anamika and Adil played with the 3D possibilities of the technique, too. |
 |
| Mini mountain range. |
 |
| Up close. |
The solid backing gives the torn surface pieces support and allows them to be hung safely. During the firing the top layer curls up like a lily pad. Here is a finished one:
 |
| Ready for the wall. |
Hands littered the floor.
 |
| Spooky. |
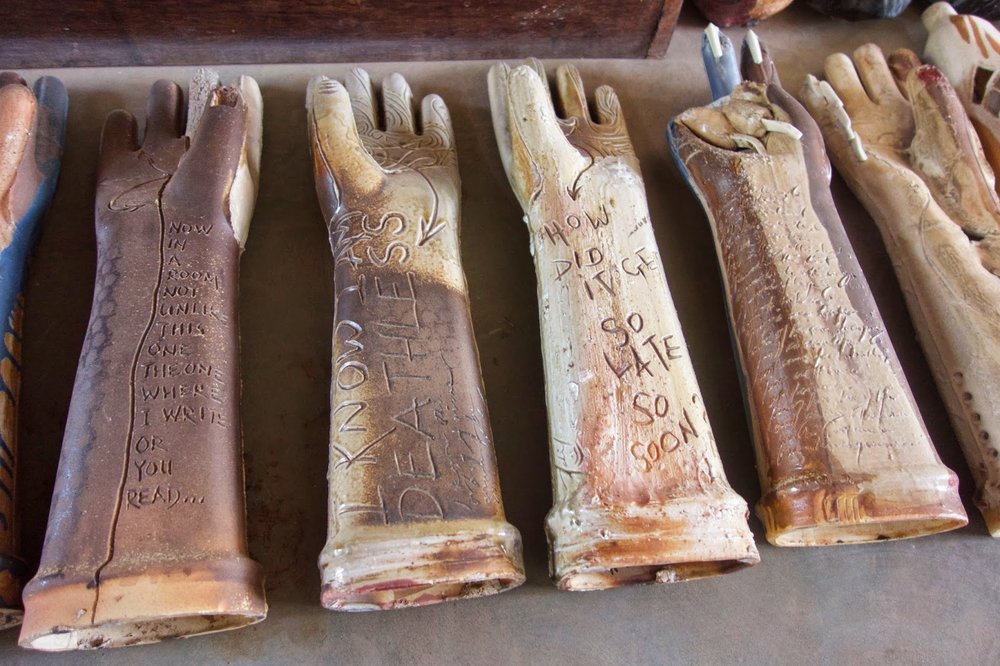 |
| How did it get so late so soon? |
Before I left I popped my head in another little space and found a selection of large platters.
 |
| Sturdy feet. |
 |
| Ready for glazing. |
 |
| Textured surface. |
And some finished ones:
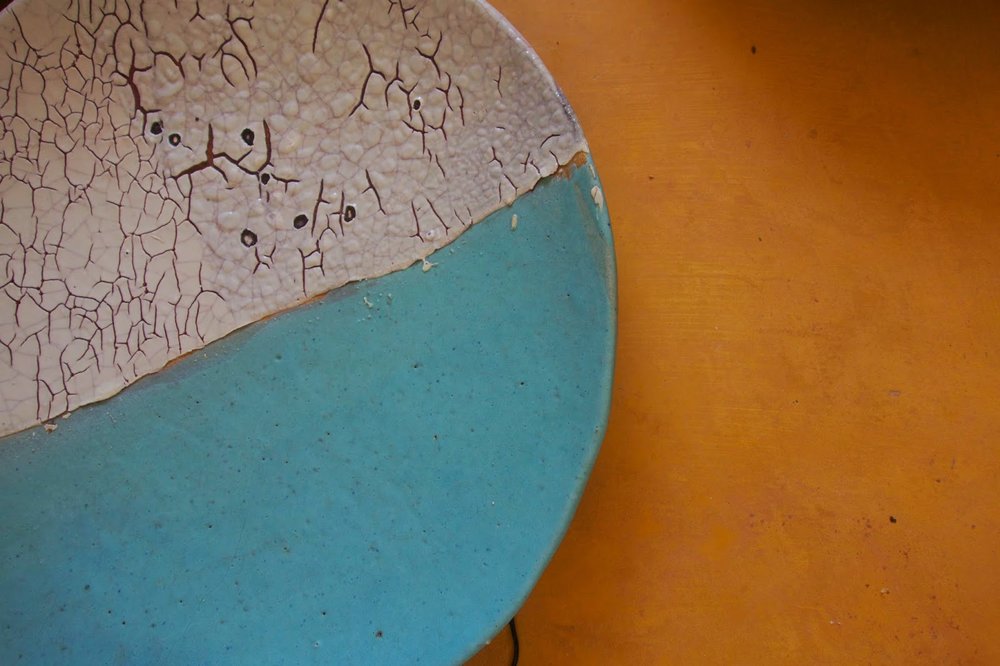 |
| You can see the same idea of playing with texture in the platters as the wall hangings. |
 |
| Nice swish. |
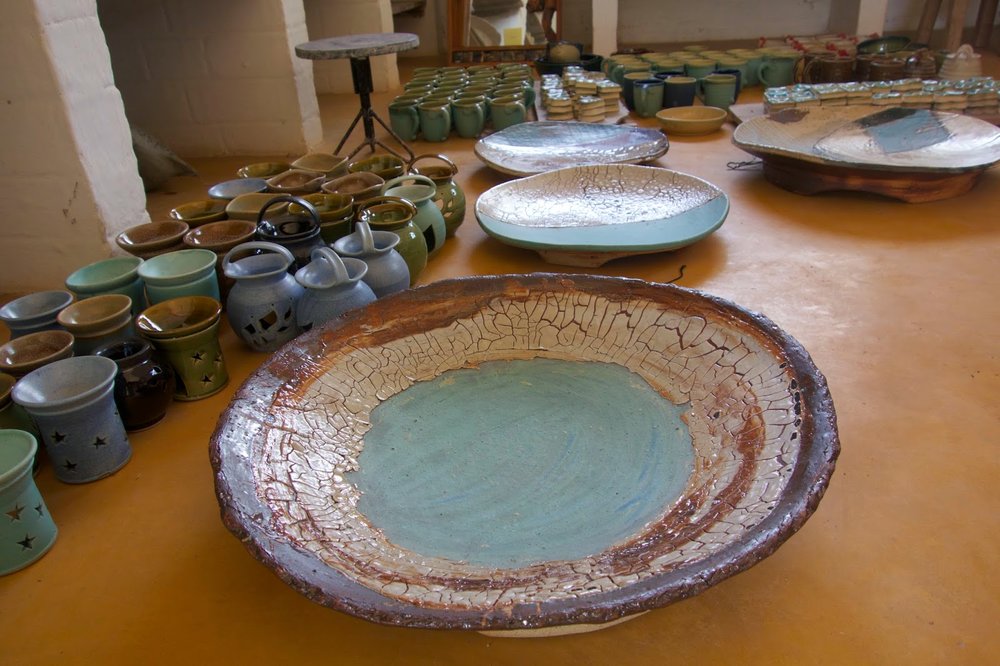 |
| I love the mad crackle glaze mixed with the blue. |
So that's a taster or the ceramics being made at Mandala Pottery. Next post will be about the pottery where most of the potters in the Dana Community trained: Golden Bridge Pottery in Pondicherry.