
The Potters of the Dharavi Slum in Mumbai
During our time in Mumbai we visited the largest slum in Asia, Dharavi. This was an amazing place, which largely dispelled our preconceptions of what a slum would be like. There a more in-depth look at the slum on the blog that Lauren and I are writing together whilst in India: http://100daysofindia.blogspot.com/
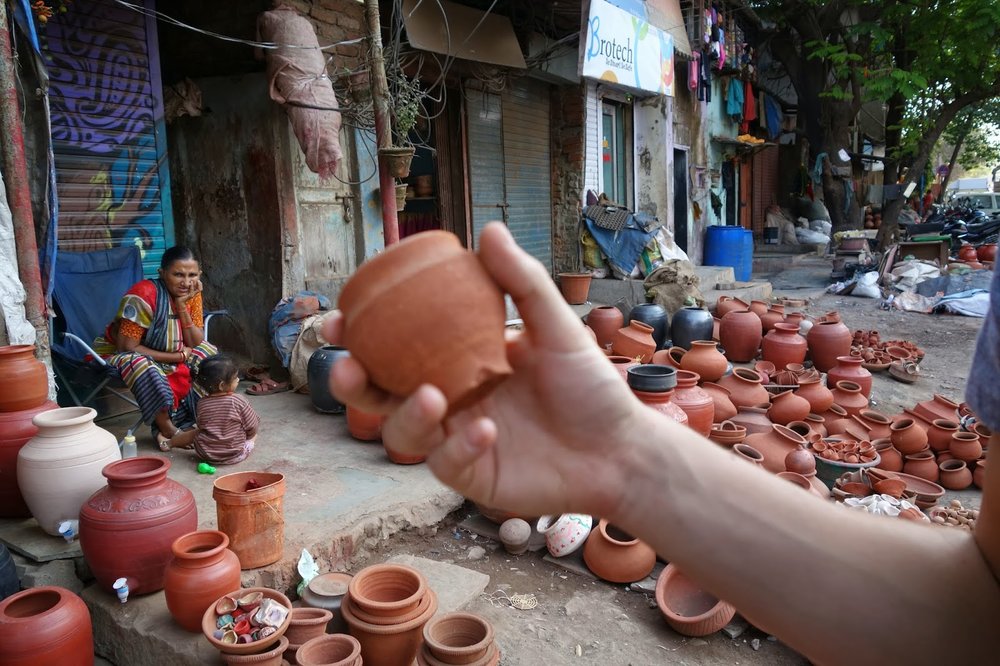
Potters make up a whole caste in India, known as the Prajapati or the Kumhar. Kumbh means earthen pot, stemming from the sanskrit, "kumbhakar" which means earthen pot-maker. The Kumhar were were some of the first settlers in Dharavi from Gujurat and still make up a significant slice of the population there. We only got to see a small section of the industry, but it was enough to get a sense of it.


Below is a chai cup that I picked up, couldn't help myself. It felt very pleasing in the palm. Chai is a moorish tea that is at once sweet, spicy and milky. Even though I normally don't take sugar in my tea, the chai here really hits the spot. There are people selling it everywhere, on every street corner, on every train etc, but sadly I have only been served it in a glass or cardboard cup. In the past everyone used clay cups and treated them as disposable items; throwing them in the gutter after finishing the tea. They are not fired to a high temperature, so would break down and pass back into the earth. What struck me most about the cup was how rough the bottom was, not even undercut to prevent chipping.
To end, two mischievous youths who insisted we took pictures of them. The one on the left was practicing his smooth wink. Lauren took all of the pictures you see, as I was shooting film (yet to be developed), so muchos thanks go to her.

Potters make up a whole caste in India, known as the Prajapati or the Kumhar. Kumbh means earthen pot, stemming from the sanskrit, "kumbhakar" which means earthen pot-maker. The Kumhar were were some of the first settlers in Dharavi from Gujurat and still make up a significant slice of the population there. We only got to see a small section of the industry, but it was enough to get a sense of it.
 |
| This was the area around the potter community. |
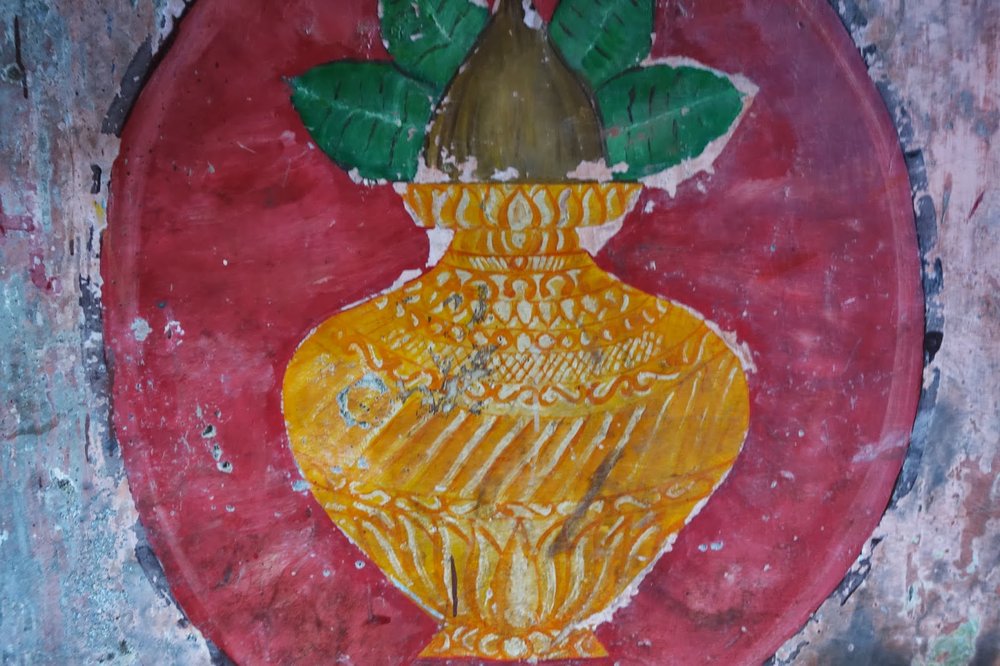 |
| Pots proudly painted on the walls. |
 |
 |
| This lady was preparing clay for throwing. |
 |
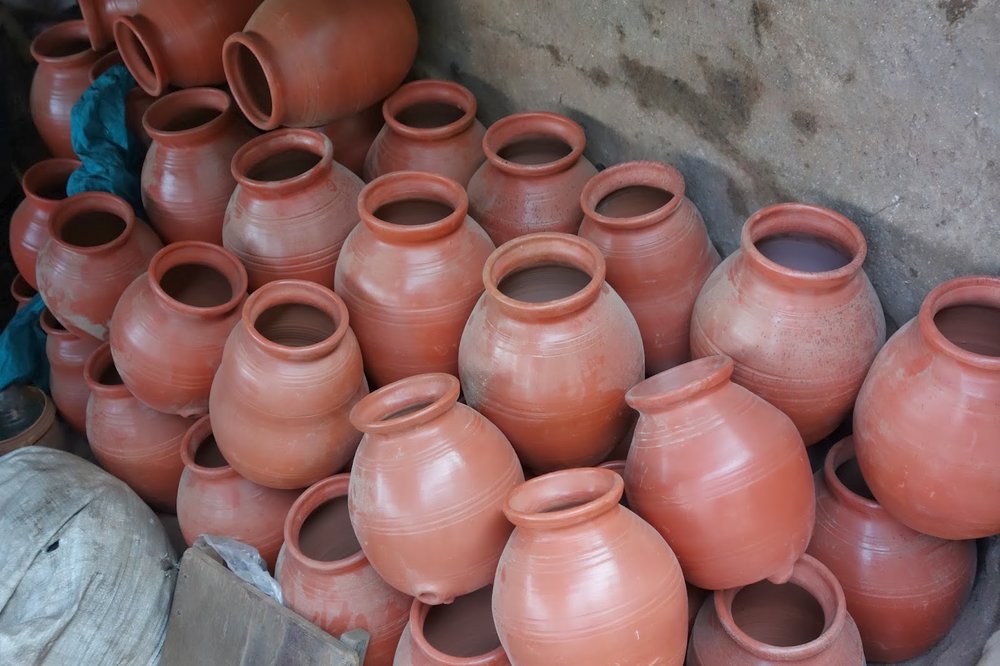
| Lots of pots, laying out to dry. You could tell they had been thrown really fast. |
 |
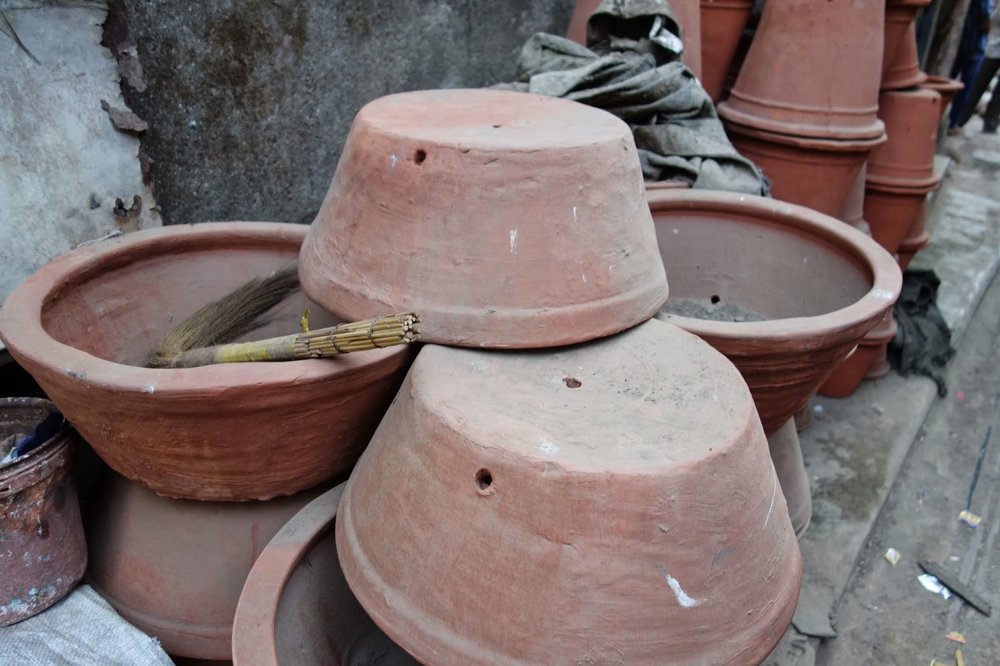
| As you can see, they were arranged a bit higgldy-piggldy. |
 |
| Notice the roughness of some of these. Many had chunks out of the rim or bits of debris stuck in them. |
 |
| I think these were destined to be lids. |
 |
| Dog, protecting essential ingredients. |
 |
| Dog, taking it easy. |
 |
| They dig clay from outside the city of Mumbai and mix it here, by foot. |
 | ||
| They also use molds, mostly for bigger forms. |
 |
| These looked a bit precarious to me. |
 |
| These were two piece pots, intended to hold candles and be used in religious ceremonies. |
 |
| Water pots. Great shape. |
 |
| Some of those lids, ready for firing. |
 |
| Big pancheon style pots. |
 |
| Flower pots! Made in the molds pictured above. |
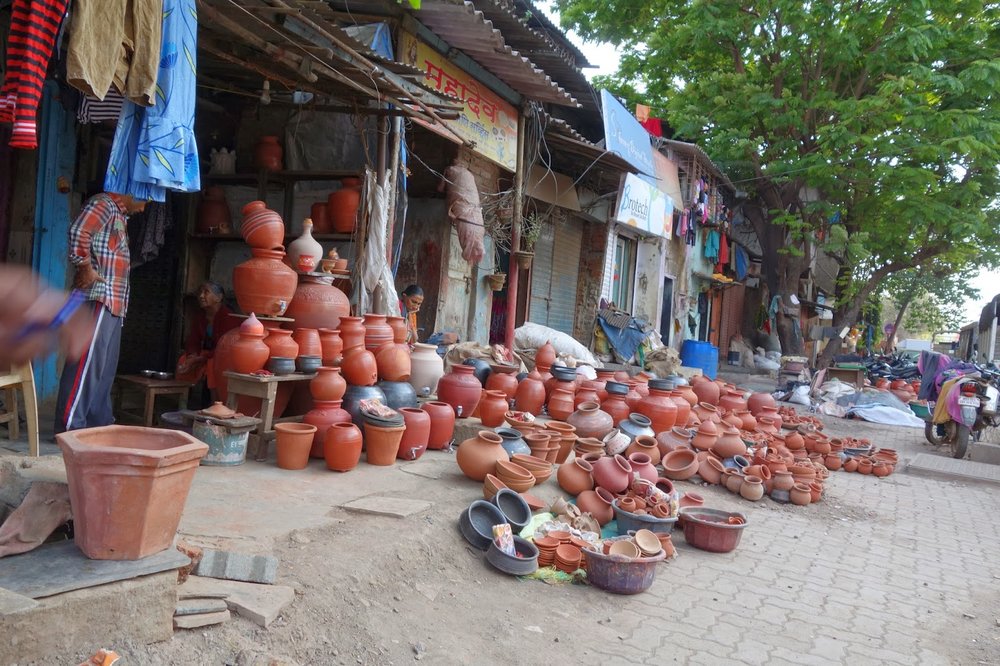 |
| The store-front. |
Below is a chai cup that I picked up, couldn't help myself. It felt very pleasing in the palm. Chai is a moorish tea that is at once sweet, spicy and milky. Even though I normally don't take sugar in my tea, the chai here really hits the spot. There are people selling it everywhere, on every street corner, on every train etc, but sadly I have only been served it in a glass or cardboard cup. In the past everyone used clay cups and treated them as disposable items; throwing them in the gutter after finishing the tea. They are not fired to a high temperature, so would break down and pass back into the earth. What struck me most about the cup was how rough the bottom was, not even undercut to prevent chipping.
To end, two mischievous youths who insisted we took pictures of them. The one on the left was practicing his smooth wink. Lauren took all of the pictures you see, as I was shooting film (yet to be developed), so muchos thanks go to her.
Developing Black and White Films at Home
I am preparing to go to India next week, well, no, actually sooner than that. Lauren and I leave on Thursday. Ahh! We are travelling around for four and a half months and producing a photo documentary book called "100 Days of India."
I will be shooting only black and white film, and am not even taking a digital camera! The body of choice is my newly refurbished Olympus OM2. My dad recently serviced it and replaced the light seals, so in preparation I have been shooting a lot of film and developing them to make sure the camera was in good shape. It is, thankfully.
So here's some info on the developing. The main reason for doing this is that it is far cheaper than going to a camera shop. I can't say it is my favourite activity in the world, but necessary.
Step 1
Measure out your chemicals. The chemicals come in a very concentrated form, so you need to dilute them. Make sure you label your containers clearly.
 Step 2
Work out how long each of your fims needs to be developed for. Keep notes so it doesn't matter if you forget the times. I water the developer down to 1+ 1, which means you have to spend a few more minutes with each one, but doubles the amount of films I can develop.

Step 3
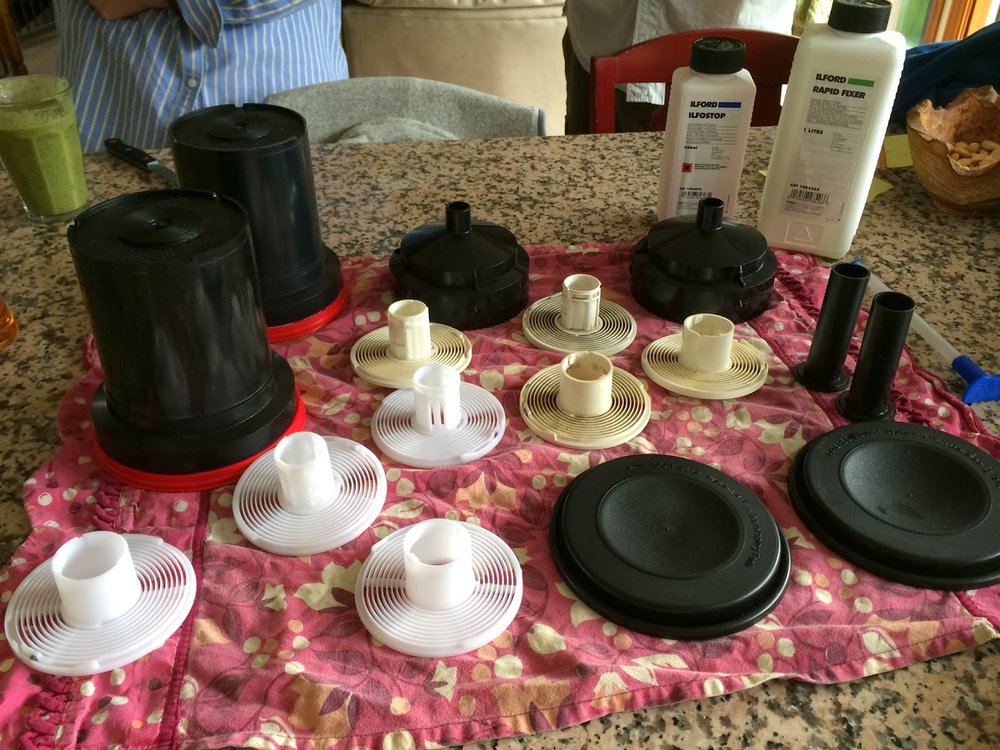
Get your equipment out.


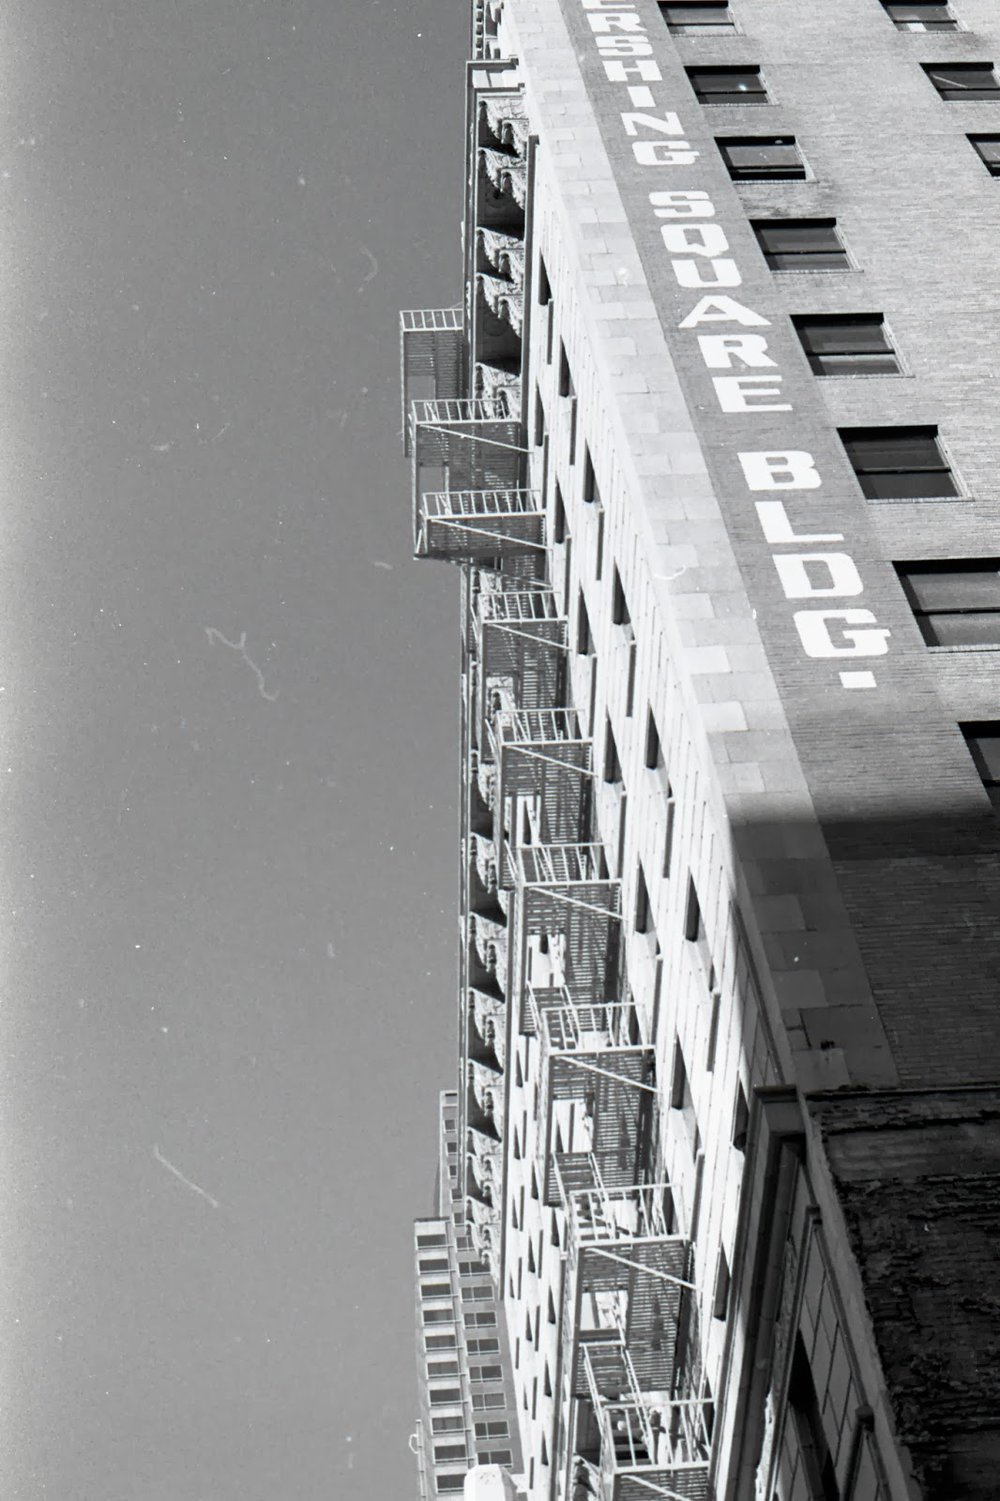
And here are some pictures I took in downtown Los Angeles, between Hill and Broadway on 5th Street.


I will be shooting only black and white film, and am not even taking a digital camera! The body of choice is my newly refurbished Olympus OM2. My dad recently serviced it and replaced the light seals, so in preparation I have been shooting a lot of film and developing them to make sure the camera was in good shape. It is, thankfully.
So here's some info on the developing. The main reason for doing this is that it is far cheaper than going to a camera shop. I can't say it is my favourite activity in the world, but necessary.
Step 1
Measure out your chemicals. The chemicals come in a very concentrated form, so you need to dilute them. Make sure you label your containers clearly.
Work out how long each of your fims needs to be developed for. Keep notes so it doesn't matter if you forget the times. I water the developer down to 1+ 1, which means you have to spend a few more minutes with each one, but doubles the amount of films I can develop.
Step 3
Get your equipment out.
Step 4
Place a tank (top left of the pic above) with a light tight lid inside the dark bag with 2 spools (white/cream things above) and 2 films to be developed. Ideally you want these to require the same time developing. So two rolls of Ilford HP5 for example.
Step 5
Inside the bag you have to take the films out of their canisters with a small pair of scissors and roll them onto the spools. When fully wound on, place them in the tank, and seal the top with a click.
Step 6
DEV! Now the rolls are light safe, in the tank, so you can take them out of the dark bag. Pour your measured out developer into the tank. For two rolls of 35mm you need 600ml. Make sure you know which film is in which tank, and how long you need to develop each for. Agitate 15 seconds out of every minute (tip it upside down and right way up again, slowly). Have a timer running. When the time is up, say 13 minutes, tip the dev down the drain.
Step 7
STOP! Pour in your stop. Agitate constantly. This takes between 30 seconds and a minute. People differ on the correct time, as the stop acts pretty much instantly. I usually do a minute.Do not tip down the drain though. Stop can be re-used for quite a while (20-30 films).
Step 8
FIX! Pour in your fix. Agitate 15 seconds every minute for 6-10 minutes. You pretty much cannot over fix your film, but I have under fixed it before. I usually err on the side of caution and fix for 10 minutes. Again, save the chemical.
Step 9
Now flush the tank out with water. Again i do this for 10 minutes, running water through it. In the final 30 seconds, drop one single drip of fairy liquid in and agitate. Tip this out. The fairy liquid helps prevent streaks.
Step 10
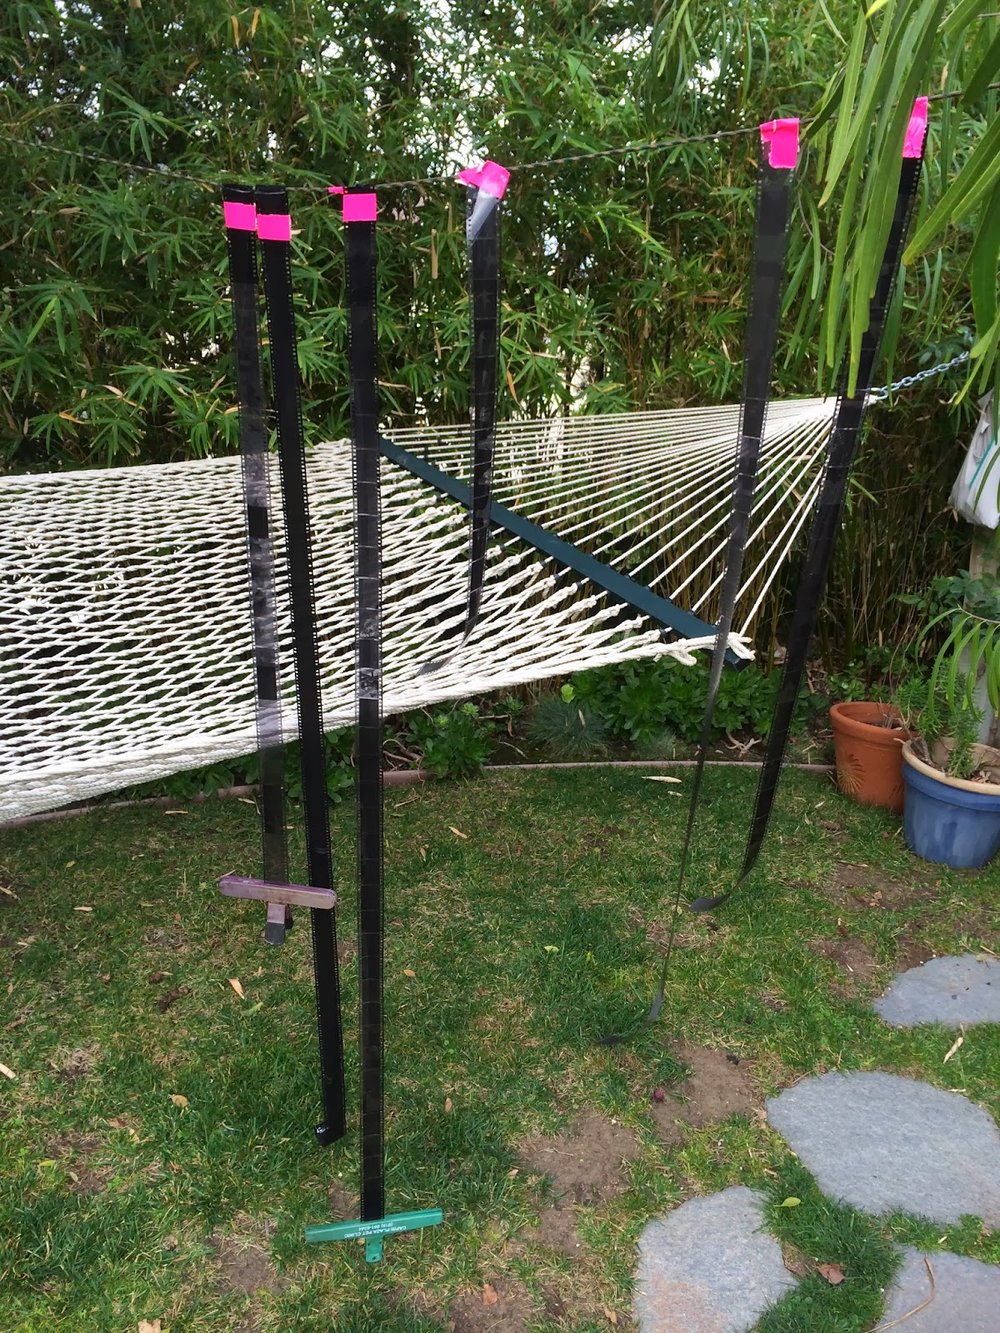
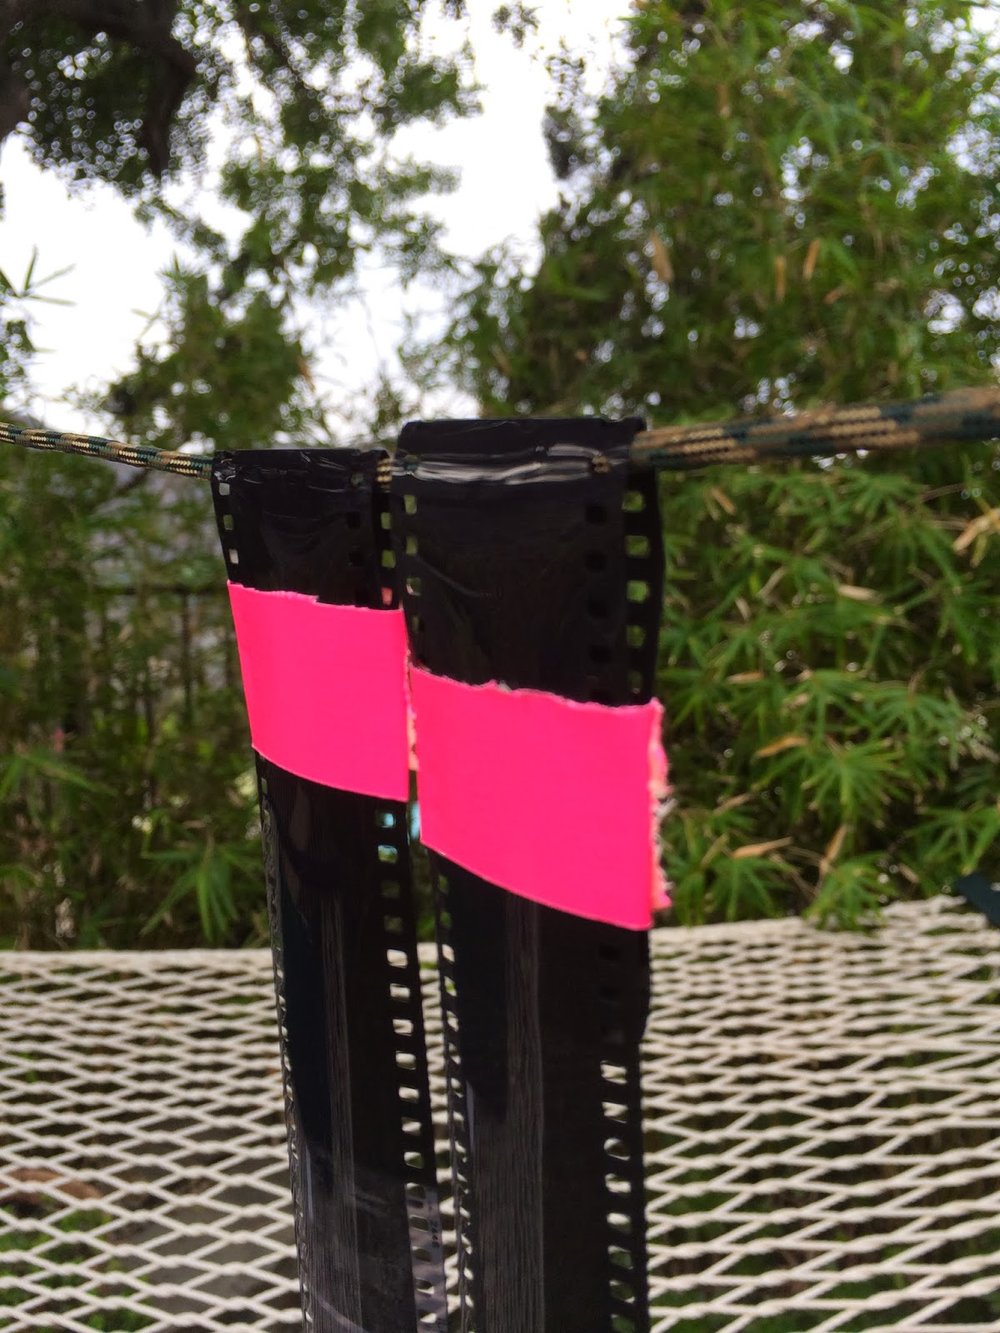
The exciting bit. Open up the tank and pull the film off the spool o have a look. Holding the film up to the light you can see if you managed to get any successful pics and if the developing worked. Then hang them up to dry for a while.
Step 11
Cut the negatives up into sets of 5 frames and put into folders. This keeps them clean and not dusty (hopefully) until you get a chance to scan them.
Step 12
Put away all your chemicals and equipment. The dev needs to be away from light so I put mine in an old orange juice carton, inside a bin bag, secured up with fluorescent pink tape. This is perhaps over the top.
And here are some pictures I took in downtown Los Angeles, between Hill and Broadway on 5th Street.
Throwing awff the hump
Throwing off the mound, or "awff the hump" as Michael Cardew would say, is a quick way to make a lot of pieces. You put a large lump of clay on the wheel and throw many pieces from it. You don't even need to centre the whole lump of clay, just the top section that you are working on. Here is the main man in action:
It's a nice technique for working on small things as you don't have to weigh out lots of mini balls of clay. Also, the piece is higher up in relation to you which means you get a better view of the outside profile. The tricky bit is getting the pieces off cleanly. Some people use a wire, some string, some a thin piece of cotton and some floss. In this case I only had a wire to hand so was using that.

Here's a short video of me in action:
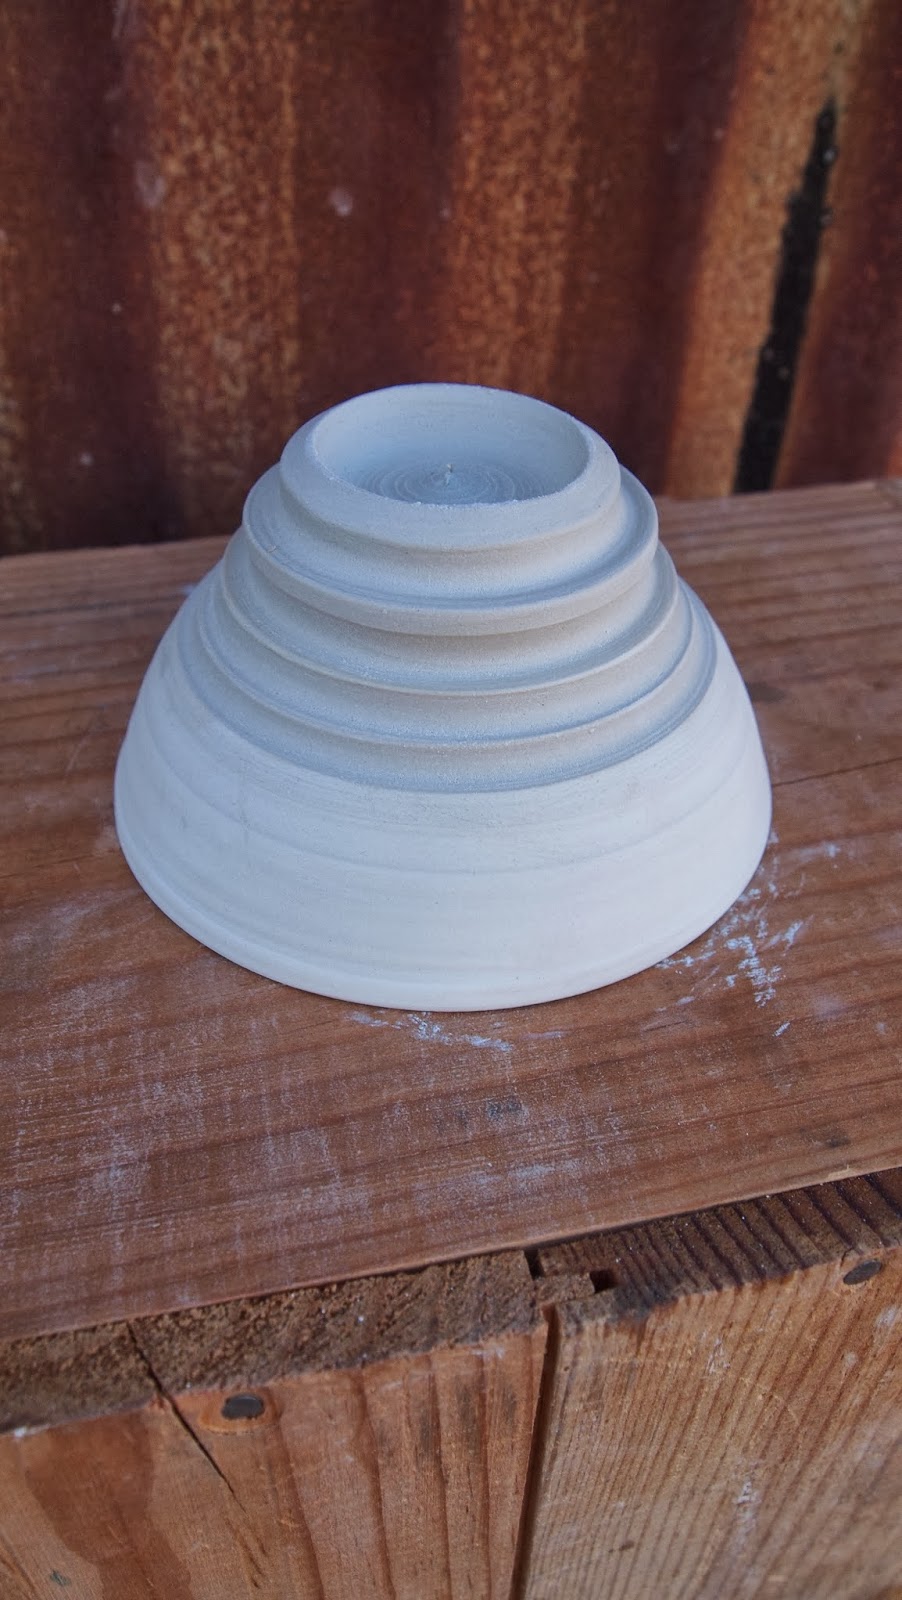
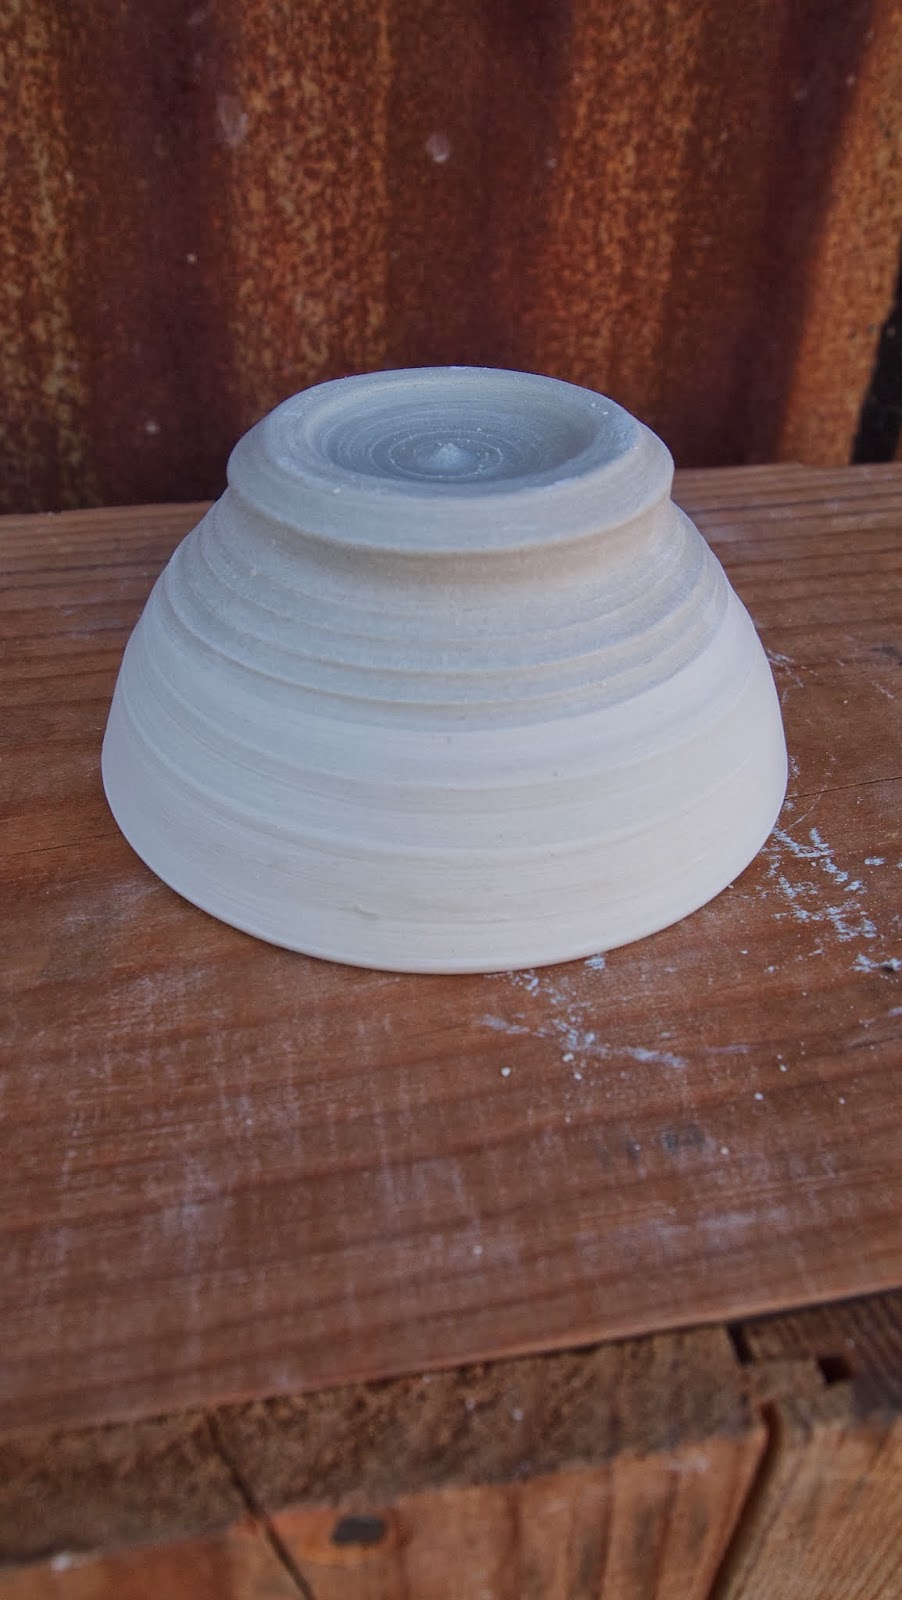
And here are some of the resulting bowls, pictured shortly after trimming. You can see they are still wet in the base, with the clay looking greyer than the rest of the cups.
The bases are always quite messy after taking them off the wheel, so do require trimming. I had intentionally left a decent wedge of clay in the bottoms to allow myself to experiment with different feet. Below are what came out.


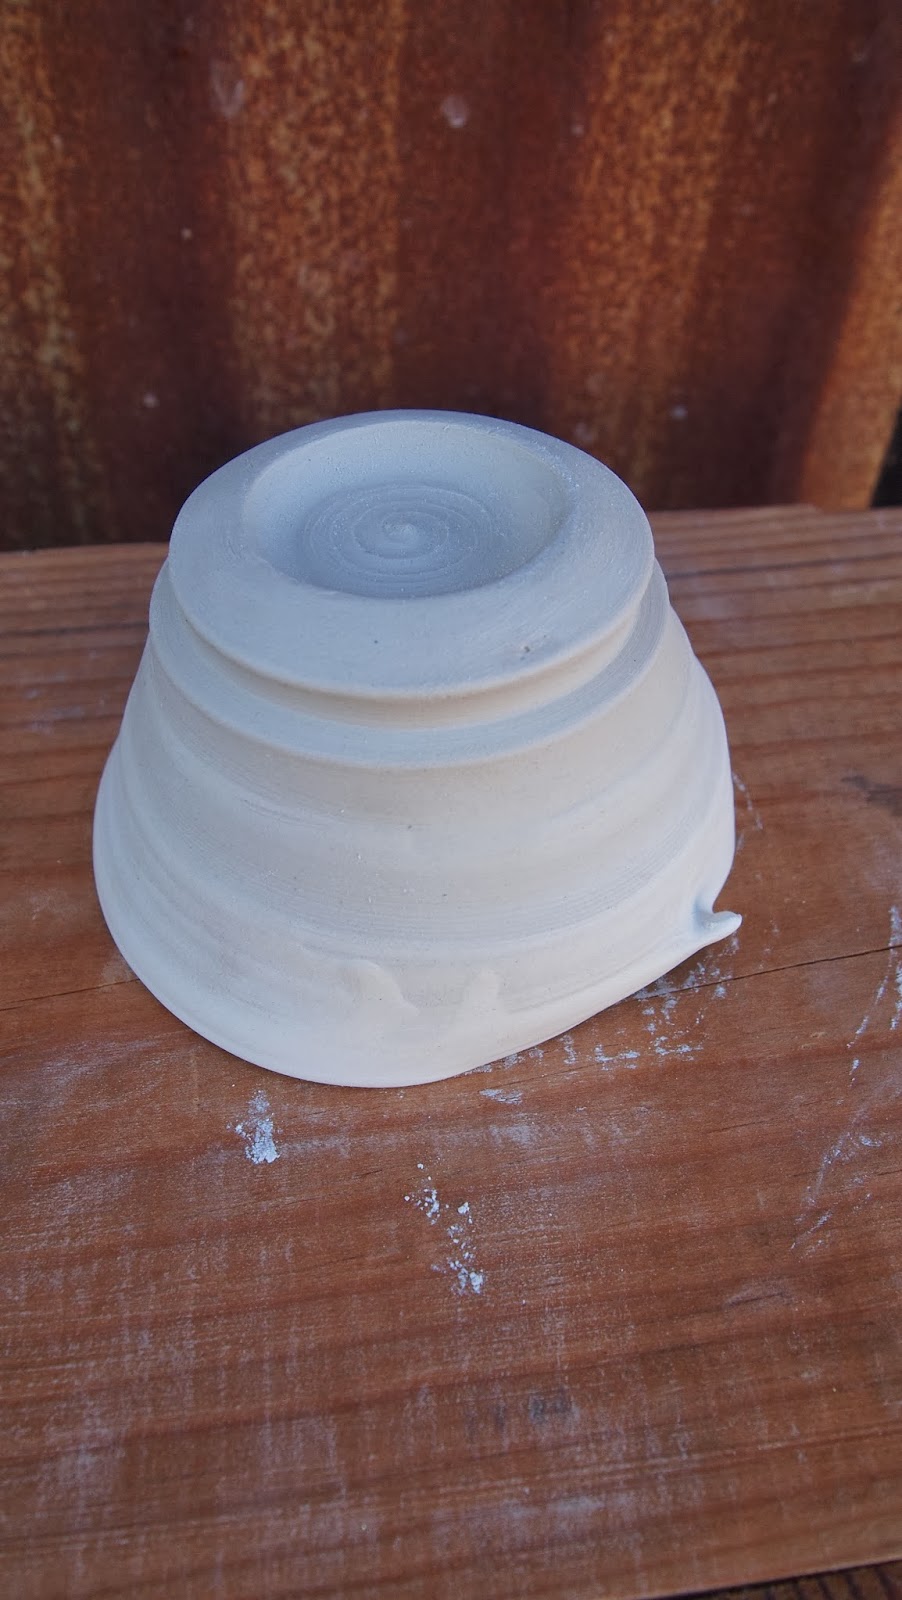

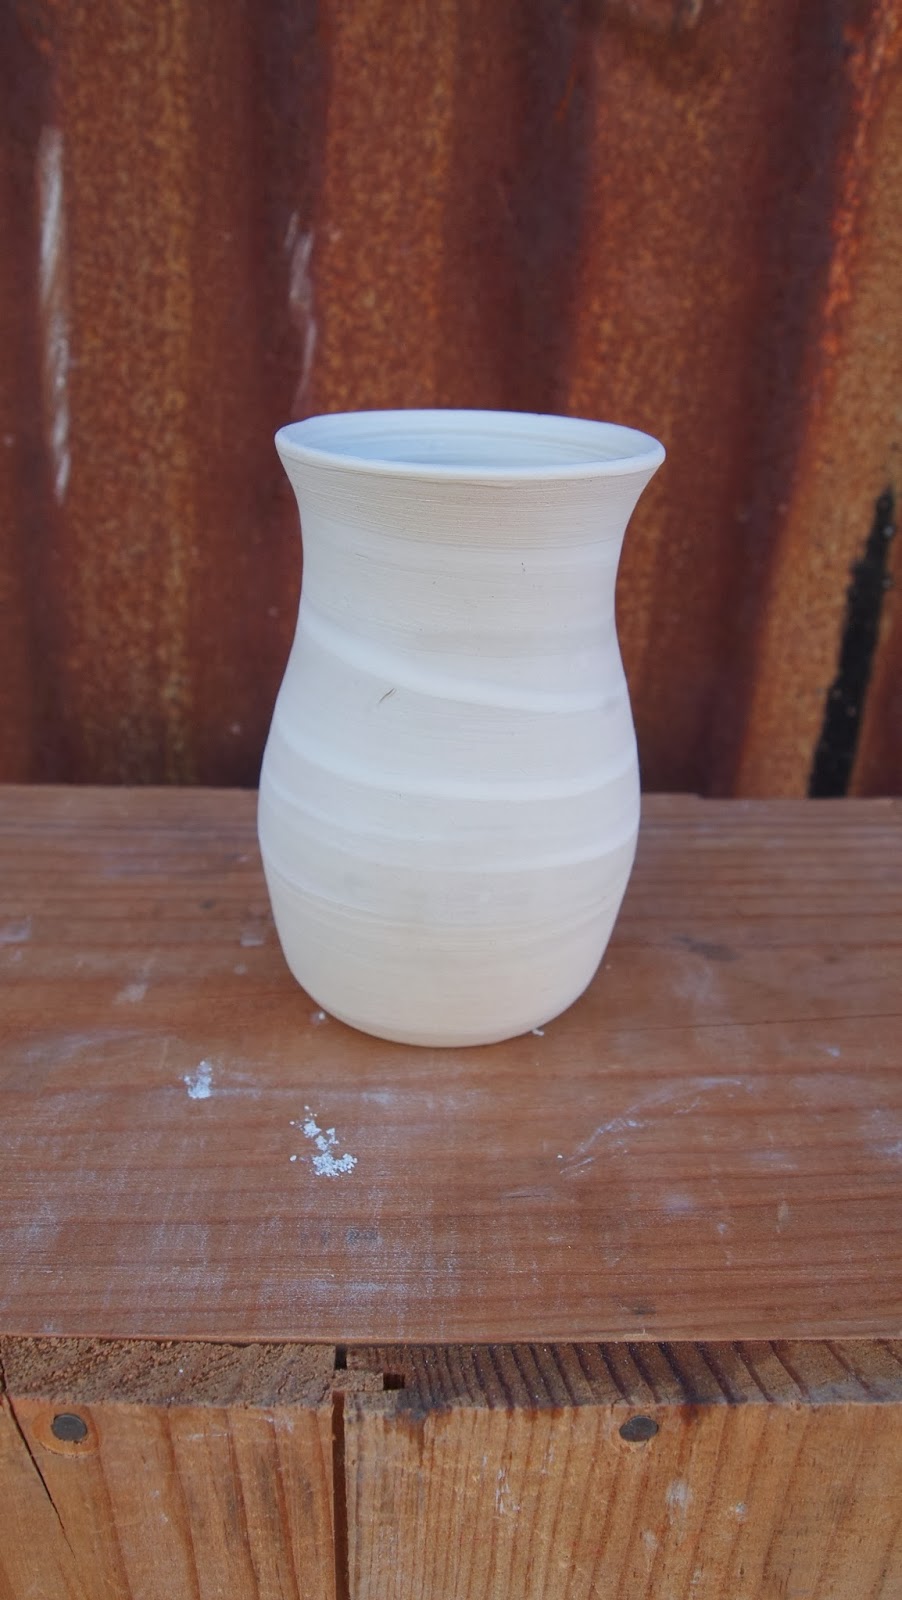
Here are some other little pots I made at the same time, but not awff the hump, just with little balls of clay. I was playing with vase shapes in miniature to get an idea f what I would like to make on a larger scale. I am not sure any of these hit the mark, but good practice anyway!


It's a nice technique for working on small things as you don't have to weigh out lots of mini balls of clay. Also, the piece is higher up in relation to you which means you get a better view of the outside profile. The tricky bit is getting the pieces off cleanly. Some people use a wire, some string, some a thin piece of cotton and some floss. In this case I only had a wire to hand so was using that.
Here's a short video of me in action:
And here are some of the resulting bowls, pictured shortly after trimming. You can see they are still wet in the base, with the clay looking greyer than the rest of the cups.
The bases are always quite messy after taking them off the wheel, so do require trimming. I had intentionally left a decent wedge of clay in the bottoms to allow myself to experiment with different feet. Below are what came out.


Here are some other little pots I made at the same time, but not awff the hump, just with little balls of clay. I was playing with vase shapes in miniature to get an idea f what I would like to make on a larger scale. I am not sure any of these hit the mark, but good practice anyway!
Making Mozzarella in 30 Minutes!
I was making lasagna a week or so ago and realised that I had forgotten to buy mozzarella. I like to top my lasagnas with slices of mozzarella, tomatoes and basil leaves. So, with my sauce simmering away on the stove, I was begrudgingly about to go back to the supermarket. Then I remembered this 30-minute mozzarella recipe I had seen online.
Here are the ingredients:
Your main ingredient is milk, and lots of it, so you want to use the best milk you can lay your hands on. Luckily, I had a gallon of milk in the fridge, and not just any milk. I'd made a special trip to Glendale to go to a Raw Milk dispenser who only parks up at this location for four hours on a Saturday. It seemed all a bit under the radar, down a side street, and you can see why when raw milk dispensers have been closed down in the L.A in the past. People have even been sent to prison over it! However, there was a queue, and the milk was flying out of the truck. I have to say that the milk did not disappoint: it's really rich and tasty. I have read that using raw instead of ultra-pasteurised, homogonised milk gives your cheese more flavour. It stands to reason that if the milk is tastier, the cheese will be, too.

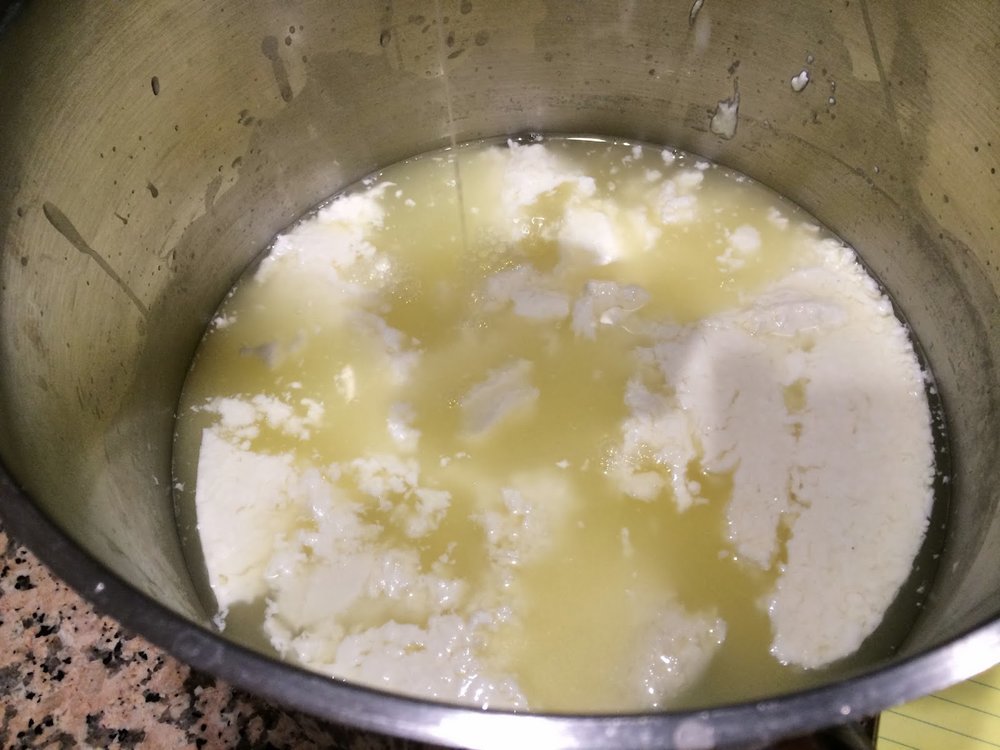
Right so, here's what you do. One gallon of milk goes in the pan. Gently heat to 55° Fahrenheit or 13° Celcius and add the citric acid. A dairy themometer comes in handy here-- again they are cheaply available. Stir well. The curds will start to separate from the whey, as pictured below.
Keep heating gently till you get to 88°F / 31°C. The curds will be curdling before your eyes. It's happening. Cheese is happening! Stir gently whilst the temperature gets up to about 105°F / 40.5°C. Turn off when the curds have started to pull away from the side of the pot and are quite thick.
Now you're supposed to let the rest for five minutes but I couldn't wait and went straight ahead to straining them.
Well, actually I had my dad strain them whilst I read out the further instructions and stirred my sauce.

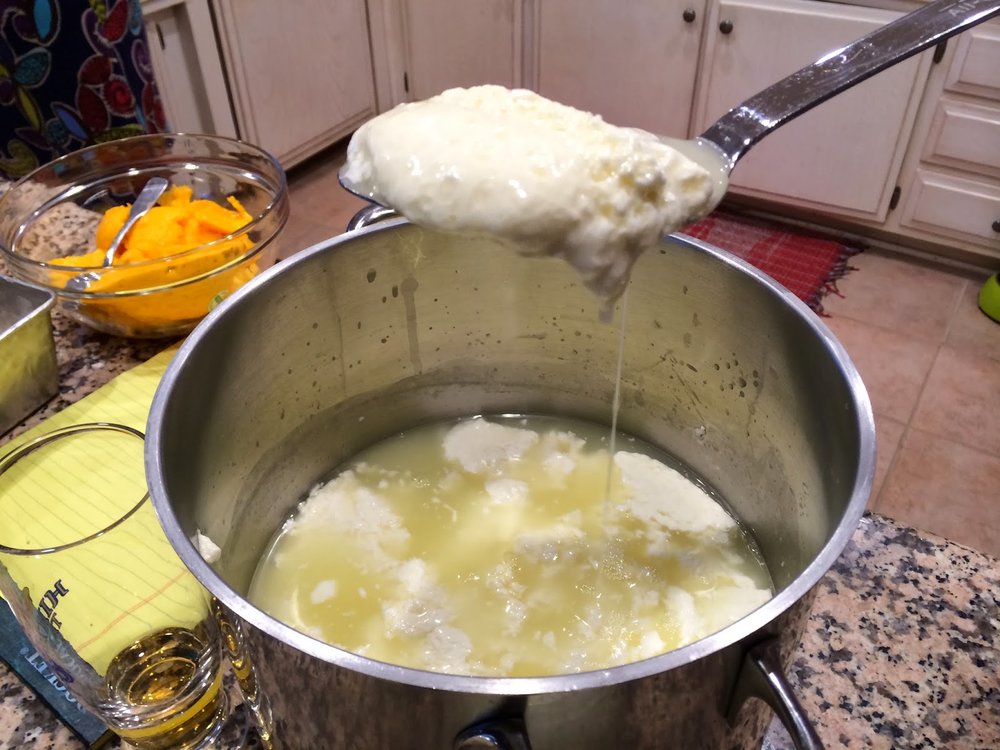
This can be done with a holey spoon. After straining you end up with a gloopy, yet almost cheese-like substance.

Time for the marigolds. The next step gets pretty hot.

Oh yeaaah. Once you have donned the gloves, put the curds in the microwave for 60 seconds. Press them after this, and tip out the runny whey. Then I added a generous few pinches of truffle salt. Pure extravagance. But you can use normal salt too. Then fold over the curds and pop back in the microwave for another 30-40 seconds.

Fold over and press again, tipping off the whey once more.

Do this once more. Microwave for 30-40 seconds, fold, tip off. Then comes the fun bit; stretching your mozzarella.

You can see that I can barely believe what I am doing here.


Magic. This stuff stretches like crazy.

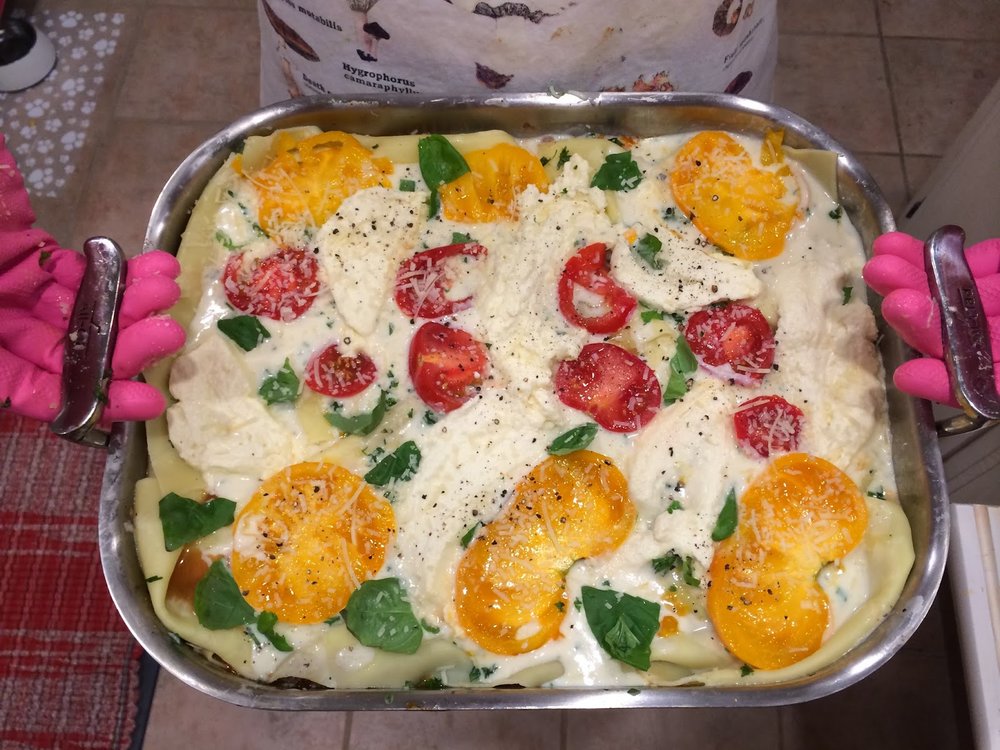
Boom. Done. There it is. Mozzarella. 30 minutes. Here's the lasagna awaiting another layer of pasta and its toppings:

Lauren's parents' dogs were pretty excited about it too.
Slicing it up. Still very warm. Obviously had to taste some and found it to be very palatable indeed, very fresh.

Close up:

Here are the ingredients:
- 1 gallon Milk, not ultra-pasteurized
- 1 1/2 tsp. Citric Acid powder, dissolved in 1/4 cup room-temperature water
- 1/4 tsp. Liquid Rennet or 1/2 tablet Rennet, dissolved in 1/4 cup room-temperature water
- 1 tsp. Cheese (Flake) Salt or Kosher Salt
Your main ingredient is milk, and lots of it, so you want to use the best milk you can lay your hands on. Luckily, I had a gallon of milk in the fridge, and not just any milk. I'd made a special trip to Glendale to go to a Raw Milk dispenser who only parks up at this location for four hours on a Saturday. It seemed all a bit under the radar, down a side street, and you can see why when raw milk dispensers have been closed down in the L.A in the past. People have even been sent to prison over it! However, there was a queue, and the milk was flying out of the truck. I have to say that the milk did not disappoint: it's really rich and tasty. I have read that using raw instead of ultra-pasteurised, homogonised milk gives your cheese more flavour. It stands to reason that if the milk is tastier, the cheese will be, too.
Right so, here's what you do. One gallon of milk goes in the pan. Gently heat to 55° Fahrenheit or 13° Celcius and add the citric acid. A dairy themometer comes in handy here-- again they are cheaply available. Stir well. The curds will start to separate from the whey, as pictured below.
 |
Now you're supposed to let the rest for five minutes but I couldn't wait and went straight ahead to straining them.
Well, actually I had my dad strain them whilst I read out the further instructions and stirred my sauce.
This can be done with a holey spoon. After straining you end up with a gloopy, yet almost cheese-like substance.
Time for the marigolds. The next step gets pretty hot.
Oh yeaaah. Once you have donned the gloves, put the curds in the microwave for 60 seconds. Press them after this, and tip out the runny whey. Then I added a generous few pinches of truffle salt. Pure extravagance. But you can use normal salt too. Then fold over the curds and pop back in the microwave for another 30-40 seconds.
Fold over and press again, tipping off the whey once more.
Do this once more. Microwave for 30-40 seconds, fold, tip off. Then comes the fun bit; stretching your mozzarella.
You can see that I can barely believe what I am doing here.
Magic. This stuff stretches like crazy.
Boom. Done. There it is. Mozzarella. 30 minutes. Here's the lasagna awaiting another layer of pasta and its toppings:
Lauren's parents' dogs were pretty excited about it too.
 |
| This is Mimi. Sniff sniff. |
 |
| And this is Zooey. Sniff sniff, lick lick. |
On to the lasagna!
Close up:
And into the oven for 45 minutes.
 | ||||||||||||
End result: The mozzarella was a little lost in the lasagna, mixing with all the other flavours, but it was delicious so I won't complain. I'll definitely be repeating it, and trying different cheeses out in the near future.
Playing with Porcelain
Over the last few weeks I have been spending some time working at Berman Ceramic Arts, a studio/school in North Hollywood, L.A. They have a wide array of clays available, so I thought I'd try my luck with porcelain.
When I tried throwing with porcelain a year or so ago it was very difficult. It was so buttery! I found bits coming off in my hands, wobbles that could not be fixed and the whole experience quite frustrating. This time round was different. I was able to throw with it fairly easily, as if it were a stoneware clay. It was still buttery but in a more satisfying way. You have to be much more light with it but can really stretch it thin.
I sat down to the wheel and thought, shit, what should I try to make?

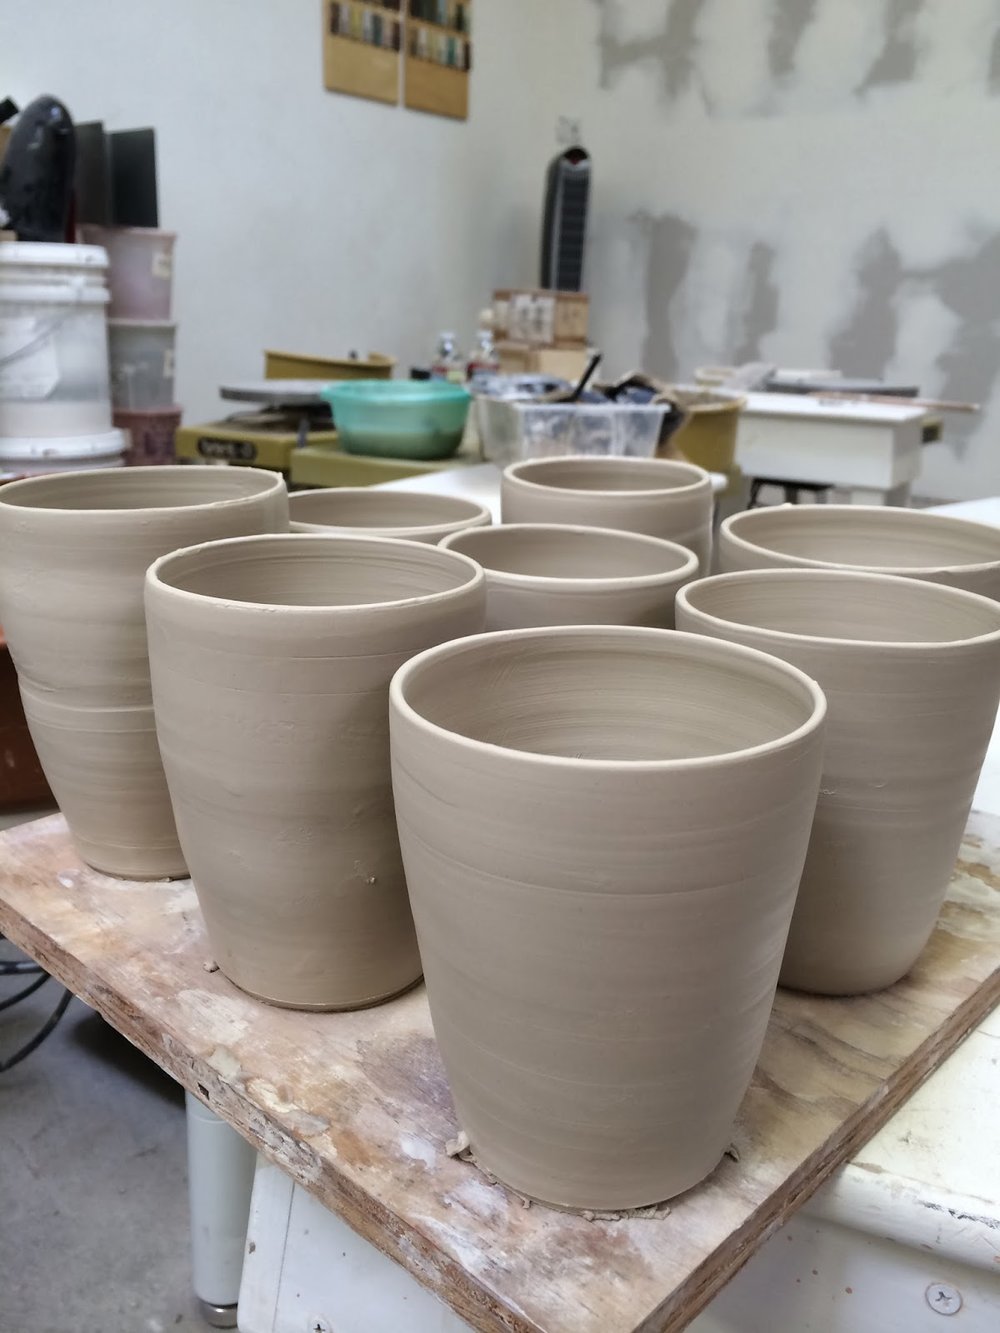
The last forms I was making at Winchcombe were beakers and handled beakers... basic cylinders with 8oz clay. I enjoyed throwing them at the time and felt like it would be good to get back in the zone with a batch of them. So, weighed out a bag of balls and set to it. I didn't throw to a stick, but tried to get them similar by pushing the clay as far as it would go. As I threw and got more confident with the clay, the beakers got taller.


When they had dried out a bit I thought they looked a tad boring, so decided to put a dimple in one. I did this with my thumb and first finger, simply pinching the wall of the cup. I liked it, so put another dimple on the cup, on the other side and higher up.

Examining it I thought it was a good alteration, adding character and making the cup more interesting to hold. So I dimpled all of them.


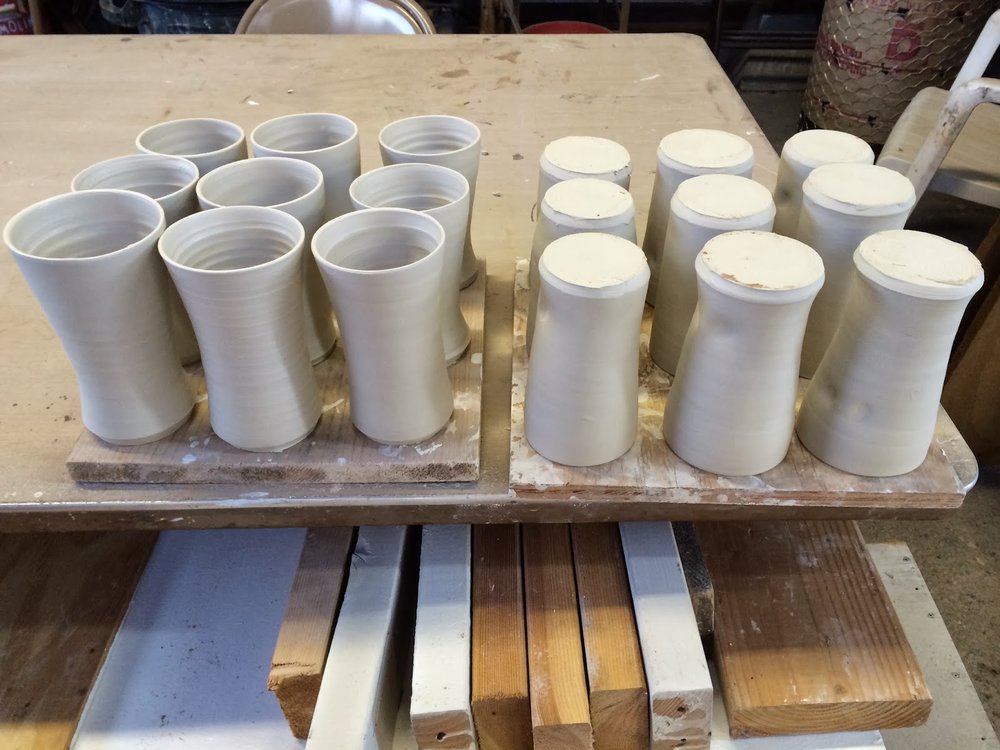
I left some weight in the first batch of them and trimmed a foot in them. Trimming porcelain is much trickier than I am used to. You have to get them at exactly the leather hard stage. When they are too wet it is impossible with globs and gloops coming off, smudging around your trimming tool. Too dry and you run often go through the bottom. After this experience I decided to try to throw the finished form on the wheel and forget about trimming.


Before I stacked them up on the racks to be biscuit fired, I added my little moose stamp. This moose is called Pomple and is very special to me. He is a tiny lead moose, originally intended to be making his mark on the world being squashed against paper in a printing press. I made a couple of books with him at Reed College when I was on exchange there, but he has since been gracing my pots with his presence. I think he prefers the soft impact of clay.
When I tried throwing with porcelain a year or so ago it was very difficult. It was so buttery! I found bits coming off in my hands, wobbles that could not be fixed and the whole experience quite frustrating. This time round was different. I was able to throw with it fairly easily, as if it were a stoneware clay. It was still buttery but in a more satisfying way. You have to be much more light with it but can really stretch it thin.
I sat down to the wheel and thought, shit, what should I try to make?
The last forms I was making at Winchcombe were beakers and handled beakers... basic cylinders with 8oz clay. I enjoyed throwing them at the time and felt like it would be good to get back in the zone with a batch of them. So, weighed out a bag of balls and set to it. I didn't throw to a stick, but tried to get them similar by pushing the clay as far as it would go. As I threw and got more confident with the clay, the beakers got taller.
When they had dried out a bit I thought they looked a tad boring, so decided to put a dimple in one. I did this with my thumb and first finger, simply pinching the wall of the cup. I liked it, so put another dimple on the cup, on the other side and higher up.
Examining it I thought it was a good alteration, adding character and making the cup more interesting to hold. So I dimpled all of them.
I left some weight in the first batch of them and trimmed a foot in them. Trimming porcelain is much trickier than I am used to. You have to get them at exactly the leather hard stage. When they are too wet it is impossible with globs and gloops coming off, smudging around your trimming tool. Too dry and you run often go through the bottom. After this experience I decided to try to throw the finished form on the wheel and forget about trimming.
I played around with various forms, from wide ones, to triangular ones, to more rounded ones, to tall convex ones. I was searchng for the perfect cup/tumbler/beaker shape by altering them a little each time and examining the results.
 |
The inside of a particularly wide one. |
But alas, I still don't know which form I prefer. I need to see some of them fired and use them. One of the biggest challenges was figuring out the base of them; trying to make them attractive straight off the wheel. I ended up cutting a sharp angle with a wooden tool and using a twisted wire. The only clean up needed then was a damp sponge wiped around the base.
The last batch I made had a little more clay and I tried to stretch the clay high rather than round. The round ones appeal to my eye, or at least they did for a while, but are more difficult to hold. These convex ones are nicer to hold, but I am not sure whether I prefer the shape.
Before I stacked them up on the racks to be biscuit fired, I added my little moose stamp. This moose is called Pomple and is very special to me. He is a tiny lead moose, originally intended to be making his mark on the world being squashed against paper in a printing press. I made a couple of books with him at Reed College when I was on exchange there, but he has since been gracing my pots with his presence. I think he prefers the soft impact of clay.
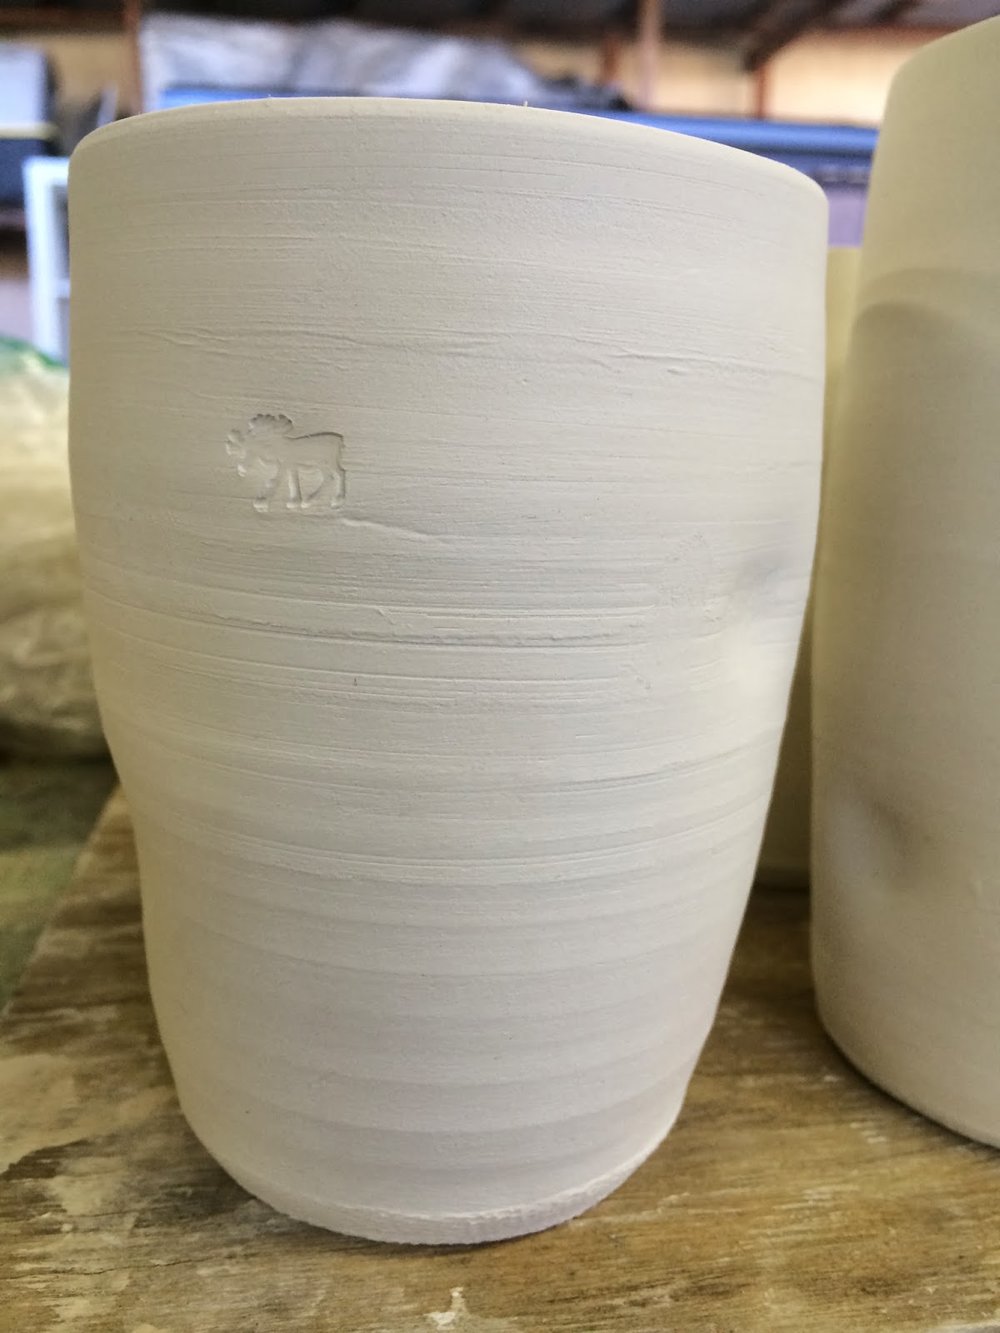 |
| Pomple! |
 |
| Pomple, up close. |
John Colbeck Kneeding and Wedging Clay at La Meridiana
Taking and watching these two short videos are how I learnt how to prepare clay. John Colbeck is an experienced ceramicist who teaches at La Meridiana every year. He has written many books including this one on throwing.
And this one on materials.
If you have to mix clays of different consistencies, colours, or just want to thoroughly mix some old clay then wedging is the way forward. John said if you follow this cutting, turning and bashing technique twenty times then the clay should be ready. Sometimes it doesn't take a full twenty times, sometimes more.
I spent my mornings at La Meridiana spiral kneeding before breakfast, as Michael Cardew suggests is the way to learn. The problem was that I was doing it all wrong before watching John; the lump of clay would inch away, riding along the bench, getting away from me. Taking the following two videos, watching them repeatedly and practicing allowed me to get them. Spiral kneeding should not tire you out, it is all about using your body weight to press down, not your arms. John makes it look as easy, as it should be.